If your washing machine is not agitating, the culprit is usually simple: an unbalanced load, a wrong cycle setting, or a jam near the agitator base. If quick fixes don’t work, the next suspects are mechanical: worn agitator dogs, a failed motor coupler, or a slipped drive belt. Before touching anything inside the tub, unplug the washer.
TL;DR:
- Overloading or unbalanced loads are the most common causes of agitation failure and can often be fixed by redistributing clothes or reducing load weight.
- Worn agitator dogs are a frequent mechanical issue, costing between $5 and $15 to replace and usually requiring under 30 minutes for a DIY fix.
- If the motor runs but the agitator does not move, the problem might be a broken motor coupler or a frayed drive belt, which are relatively affordable to replace.
- Electronic issues like a faulty lid switch or unbalance detection can also cause agitation problems, with parts costing around $5 to $15 and often fixable with simple resets.
- Major transmission or motor failures are less common and typically require professional diagnosis to avoid costly repairs or further damage.
Table of Contents
- Why Is My Washer Idle? Quick Checks to Try First
- Inspect the Agitator Dogs: How to Test and Replace Them
- Motor Coupler or Drive Belt: Which One Failed?
- Could the Lid Switch or Control Board Be the Problem?
- What Do Transmission and Motor Failures Look Like?
- Basic Tools and Safe Tests You Can Run at Home
- Safety Checklist and When to Call a Technician
- What Technicians See Most Often on Service Calls
- The Honest Take on Fixing a Non-Agitating Washer
- Want a Fast, No-Guesswork Repair? Here’s How to Book One
- Sources
Why Is My Washer Idle? Quick Checks to Try First
Most agitation failures trace back to something you can fix in under five minutes, not a broken part. Overloading and unbalanced loads are among the most common, most overlooked causes of a washer that seems to have stalled mid cycle.
Start with the load itself:
- Open the lid and check whether clothes have clumped to one side, especially heavy items like towels or a comforter.
- Remove a few pieces if the tub is packed tight. Agitators need room to move fabric, not just spin against it.
- Redistribute bulky items so weight sits evenly around the tub before restarting.
Once the load looks right, work through the settings and reset sequence:
- Confirm you selected an actual wash cycle, not a spin-only or rinse-only setting. It sounds obvious until you realize a distracted push of the dial is the actual problem half the time.
- Check whether the machine is on a “sensing” or fill stage. Some machines pause briefly before agitating, and that pause can look like a dead stop.
- Unplug the washer for one full minute, then plug it back in. On some top-load models, you also need to open and close the lid several times in a row to force a controller reset.
- Lift the fabric softener or bleach dispenser cap and look for anything wedged underneath it, including a stray sock or a coin that fell from a pocket.
- Look directly down into the agitator’s top cap area for lint buildup or small debris blocking rotation.
If none of that gets things moving, you’re likely looking at a mechanical issue rather than user error.
Inspect the Agitator Dogs: How to Test and Replace Them
Agitator dogs, the small plastic cogs inside the agitator base, are usually the cheapest and easiest mechanical fix. These directional cogs wear down over time and often cost between $5 and $15 to replace, which makes them worth checking before you assume something bigger has failed.
Here’s how to test them, once the washer is unplugged and the water supply is off:
- Pry off the fabric softener cap at the top of the agitator. It usually just pulls straight up.
- Remove the bolt or clip underneath, which holds the agitator’s top section to the base.
- Try rotating the agitator by hand in both directions.
- If it spins freely both ways with almost no resistance, the dogs are worn out and no longer catching. That’s your answer.
- If it barely moves or feels gritty and stripped, the splines connecting it to the drive shaft may be damaged instead.
Replacing the dogs means lifting off the agitator’s top cap, pulling out the old cog assembly, and pressing in a new kit sized for your model. Pay close attention to orientation. Installing the dogs backward causes the exact same symptom as worn ones, since the teeth need to face a specific direction to catch the drive mechanism on each rotation.
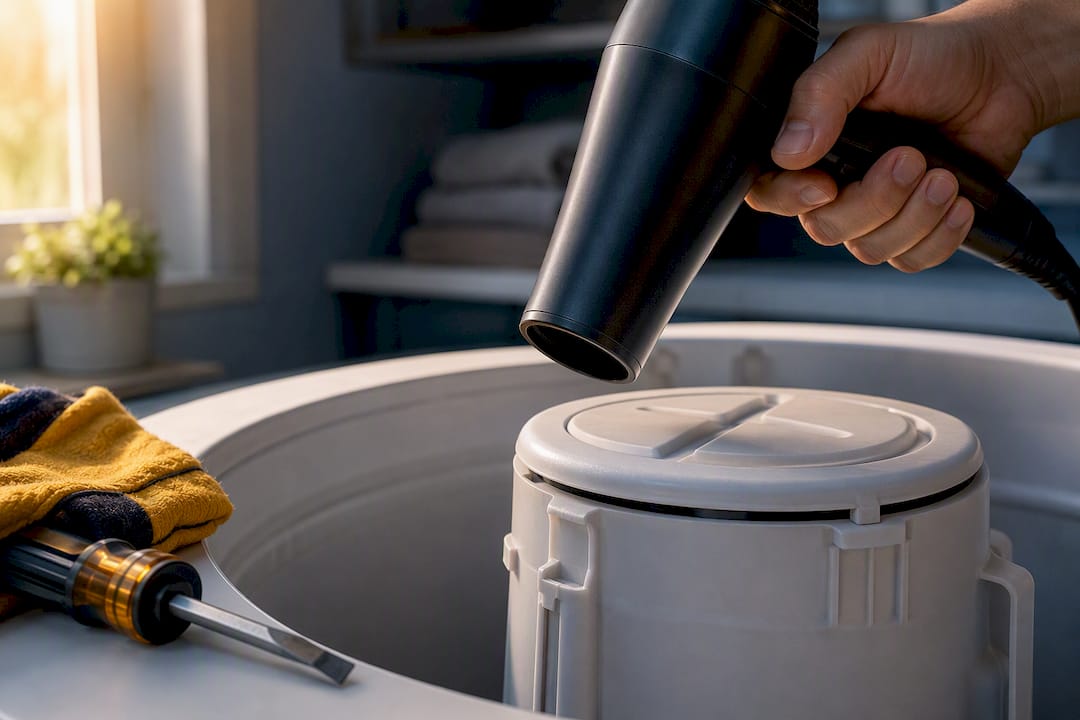
Pro Tip: If the agitator cap doesn’t budge, don’t force it with a screwdriver or pry bar near the plastic housing. Warm the cap slightly with a hair dryer first. Cracked plastic on a 10 year old washer often costs more to source than the part you were trying to fix.
Replacement dog kits are widely available through appliance parts retailers matched to your model number, and most swaps take under 30 minutes once you’re inside the agitator.
Motor Coupler or Drive Belt: Which One Failed?
If the agitator won’t budge but the motor clearly runs (you can hear it humming), the coupler or belt is the next place to look, not the agitator itself. On direct-drive washers, the motor coupler is designed as a sacrificial part that fails on purpose to protect the motor and transmission from damage when a load gets too heavy or jams.
The visual clues tell you which part failed before you even open the machine:
- Black rubber shavings or dust under the washer, near the motor housing: that’s a coupler that’s ground itself apart.
- A belt that looks frayed, glazed, cracked, or has come off its pulley entirely: that’s a belt-drive problem, common on older top-load models.
- Motor spins but agitator and tub both stay dead still: points hard toward the coupler on direct-drive machines.
Access differs by design. Direct-drive washers usually require removing the front or rear access panel near the motor. Belt-drive machines often need the cabinet tipped back or a bottom panel removed to see the belt and pulley system.
Couplers typically run under $30 as a part and are one of the more approachable DIY swaps once you’re inside the cabinet, since they usually just slide onto the motor shaft. Belts require more precision around tensioning and pulley alignment.
Pro Tip: Clean out every fragment of a broken coupler before reassembling. Leftover rubber bits can work their way into the pump and clog it, turning a simple part swap into a second repair a week later.
If you’re not comfortable getting the cabinet open safely, or the coupler has sheared apart with debris scattered near the pump inlet, this is a reasonable point to call in a technician.
Could the Lid Switch or Control Board Be the Problem?
Not every stalled cycle is mechanical. Modern washers have safety switches and electronic protections that block agitation on purpose, and it’s easy to mistake that behavior for a broken machine.
The lid switch is the simplest to check. Most machines make an audible click when the lid closes and the switch engages. Open and close the lid a few times and listen. If you hear nothing, the switch itself may have failed, or the striker on the lid isn’t lining up with it anymore.

Out-of-balance detection is the other common trigger. Many washers deliberately pause or cancel agitation when the load shifts too far to one side, sometimes flashing an error code on digital display models. That’s not a malfunction. It’s the machine protecting its own bearings.
Roughly $5 to $15 is what a replacement lid switch typically costs as a part, making it one of the cheaper fixes on this list if a multimeter test confirms it’s dead.
Before assuming a control board issue:
- Check your owner’s manual for the specific blink or beep pattern your model displays.
- Try the unplug and lid-lift reset sequence again, since some controllers need several open close cycles to clear a fault.
- Redistribute the load if an unbalance code appeared, then restart the cycle from scratch.
A true control board diagnosis, where the switch tests fine but the machine still won’t send power to the motor, usually calls for a multimeter and a wiring diagram specific to your model.
What Do Transmission and Motor Failures Look Like?
This is where DIY troubleshooting starts running into real risk, both to your wallet and to the machine itself. Transmission and motor failures sit at the harder end of the ranked list of likely causes that most repair guides recommend working through, largely because they’re expensive to diagnose wrong and expensive to fix right.
Watch and listen for these signs:
- Grinding or metallic scraping noises during what should be the agitation phase, even if the motor sounds like it’s running normally.
- The output shaft not oscillating when you remove the agitator and run a short test cycle, even though the motor is clearly powered and spinning.
- Loss of torque, where the agitator moves but with noticeably weak, sluggish motion instead of a firm stroke.
- A motor that hums but never engages, which can point to a failed start capacitor rather than the transmission itself.
To check the transmission specifically, unplug the washer, pull the agitator off, and run a brief powered test while watching the exposed drive shaft. If the shaft oscillates on its own but the agitator didn’t when it was attached, the fault sits in the agitator, dogs, or splines, not the transmission. If the shaft itself stays still, the problem is upstream in the coupler, belt, motor, or transmission housing.
Transmission repairs involve disassembling gear housings packed with grease and small components, and a full transmission replacement can run several hundred dollars in parts alone before labor. Motor and capacitor issues are somewhat more approachable but still carry real risk of electric shock if you’re not confident working around wiring. This is the tier of washer problems where calling a professional usually saves more money than it costs.
Basic Tools and Safe Tests You Can Run at Home
You don’t need a full toolbox to narrow down most of these issues. Keep it simple:
- A digital multimeter to test continuity on the lid switch and basic motor circuits.
- A basic socket and nut driver set for panels, agitator caps, and coupler access.
- Work gloves and a flashlight for peering into tight spaces around the motor and pump.
For the lid switch, set your multimeter to continuity mode, disconnect the switch’s wire harness, and touch the probes to the switch terminals while pressing it closed by hand. A reading of continuity when pressed, and none when released, confirms the switch works; no change at all means it’s dead.
For error codes, check your model’s manual for the exact blink or beep sequence rather than guessing. Codes vary widely between brands and even between model years from the same manufacturer.
Pro Tip: If a multimeter test shows continuity everywhere it should and the washer still won’t agitate, stop testing individual parts and start suspecting the control board itself. Chasing wiring further without a schematic risks damaging components that were working fine.
Safety Checklist and When to Call a Technician
Every inspection starts the same way: unplug the washer, and if you’re working near the water lines, shut off the supply valves too. Skipping this step before opening any panel risks electric shock or water damage that turns a cheap fix into an expensive one.
Call a professional if you notice any of these:
- Grinding or metal-on-metal noises during agitation attempts.
- The motor humming repeatedly with zero agitator movement, even after a coupler check.
- Visible metal shavings or gear debris near the transmission housing.
- Water leaking from seals or fittings you haven’t touched yet.
Technicians generally advise stopping DIY work at this point, since continued cycles can grind transmission damage further or push debris into the pump.
Before booking a visit, have your model number, a brief description of the symptoms, and a list of what you’ve already tried ready to go. A technician will typically check the coupler, belt, lid switch, and transmission shaft in that order, replacing whichever part actually failed rather than guessing.
What Technicians See Most Often on Service Calls
Overloading is the pattern that comes up again and again on actual repair visits. Heavy, unbalanced loads wear down agitator dogs and motor couplers far faster than normal use, and a jammed sock or loose coin at the base of the agitator causes more stalled cycles than most homeowners expect.
A typical repair visit covers a full inspection of the agitator, coupler or belt, and lid switch before any part gets replaced. Coupler swaps and dog replacements are often finished within a single visit, while transmission issues can take longer depending on parts availability for the specific model. Technicians also clean out any rubber or metal debris left behind by a failed part, since leftover fragments are a common reason the same problem returns within weeks.
The Honest Take on Fixing a Non-Agitating Washer
Most guides on this topic jump straight to “replace the coupler” or “check the transmission” without ever mentioning that the fix is often something as unglamorous as a sock stuck under the dispenser cap. That’s backwards. The cheapest, fastest checks solve the problem more often than most people expect, and they cost nothing but five minutes.
Where conventional advice really falls short is sequencing. Too many articles list every possible cause in no particular order, which sends homeowners straight to buying a coupler kit when the real issue was an unbalanced towel load. Work from easiest to hardest: load and settings, then agitator dogs, then coupler or belt, then lid switch, and only then transmission or motor.
The other thing worth saying plainly: a grinding noise is not a DIY project. It’s tempting to keep running the machine “just to see,” but that’s exactly how a $30 coupler problem turns into a $300 transmission job. Know where your comfort level ends, and don’t be afraid to stop there.
— Rich
Want a Fast, No-Guesswork Repair? Here’s How to Book One
If you’ve worked through the checks above and the washer still won’t agitate, or the noise coming from underneath sounds like something metal grinding against metal, that’s the point to bring in a technician instead of pulling more panels yourself. In-home washing machine repair services with warranty coverage for parts and labor are available, providing assurance for coupler or transmission repairs.
Before you schedule, jot down your washer’s model number, what you’ve noticed (grinding, humming, no movement at all), and whatever troubleshooting you’ve already tried. That saves time on the visit and helps the technician arrive ready with the right part on hand.
You can see the full scope of washing machine repair services offered, or go straight to scheduling a service visit online to get a technician out to diagnose and fix the problem for good.
Sources
- Not Agitating – Washer (Whirlpool product help)
- How to Fix A Washer That Won’t Agitate (PartSelect)
- Washer motor coupler guide (WasherCodeGuide)