Most washers that won’t spin are trying to tell you something specific: a drainage clog, an unbalanced load, or the wrong cycle setting. Run through a six-point checklist before assuming the machine is dying. Only stop and call a technician if you smell burning, a breaker trips, or an error code won’t clear after a basic power reset.
TL;DR:
- Most spin cycle issues are caused by drainage blockages, unbalanced loads, or incorrect cycle settings rather than motor or control failures.
- Regularly cleaning the pump filter, ensuring proper load balance, and checking the lid latch can prevent most no-spin problems in under five minutes.
- Faulty drainage components, unbalanced loads, or low spin-speed settings are the most common mechanical reasons for a washer not spinning.
- Mechanical parts like motor couplings, drive belts, and lid switches are wear items that typically require professional repair to avoid further damage.
- Immediate professional help is necessary if there is a burning smell, electrical issues, or persistent error codes after basic troubleshooting.
Table of Contents
- Why Is My Washer Not Spinning? Quick Checklist To Try First
- Common Causes Behind a Washer Spin Cycle Problem
- Could Motor Coupling or a Drive Belt Be the Problem?
- How Do You Test a Faulty Lid Switch or Door Sensor?
- Transmission or Clutch Problems on Older Top-Load Washers
- Diagnosing a Malfunctioning Timer or Control Board
- Checking and Testing the Washer’s Motor
- Is a Blocked or Faulty Water Pump Stopping the Spin Cycle?
- When to Call a Professional for Your Washer Not Spinning
- Preventive Maintenance That Reduces Future Spin Failures
- Get Your Washer Fixed Right the First Time
- Sources
Why Is My Washer Not Spinning? Quick Checklist To Try First
Before you assume the worst, work through these six checks in order. Each one takes less than five minutes, and together they solve the majority of washer spin cycle problems homeowners run into.
- Check your cycle and spin-speed settings. Many machines remember the last cycle used, so if someone ran a “Low spin” or “Rinse hold” load last time, your washer might be quietly obeying that setting instead of malfunctioning. Look for a spin speed selector or a “no spin” indicator light.
- Look inside the drum for standing water and check for error codes. Water sitting at the bottom after a completed cycle means drainage failed before spin ever had a chance to start. Jot down any code shown on the display.
- Clear the pump filter or check the drain hose. On front loaders, a clogged filter is one of the single most common culprits. On any washer, a kinked or improperly installed hose blocks drainage just as effectively.
- Open and close the lid or door and listen for the lock. Most machines have a locking latch, and if it doesn’t click into place, the control board will refuse to start spin as a safety measure.
- Redistribute the load. Pull items apart, spread them evenly, or toss in a damp towel to correct a lopsided drum, then try “Drain & Spin” or run an empty spin test.
- Do a safe power reset. Unplug the washer for 60 seconds, plug it back in, and start a new cycle. Skip this step if you noticed any burning smell or a tripped breaker.
Pro Tip: Write down the exact wording of any error code before you reset the machine. Codes often clear themselves on restart, and a technician will need that information if the problem returns.
Common Causes Behind a Washer Spin Cycle Problem
Once you’ve run the quick checklist, it helps to understand why each of these problems stops the spin cycle in the first place. Knowing the mechanism tells you whether you’re looking at a five-minute fix or something that needs a professional.
Drainage problems
A washer physically cannot spin with water still in the drum. That’s not a quirk. It’s a safety design that keeps the drum from flinging water everywhere at high speed. If you see standing water after a cycle finishes, the pump filter or drain hose is almost always the reason.
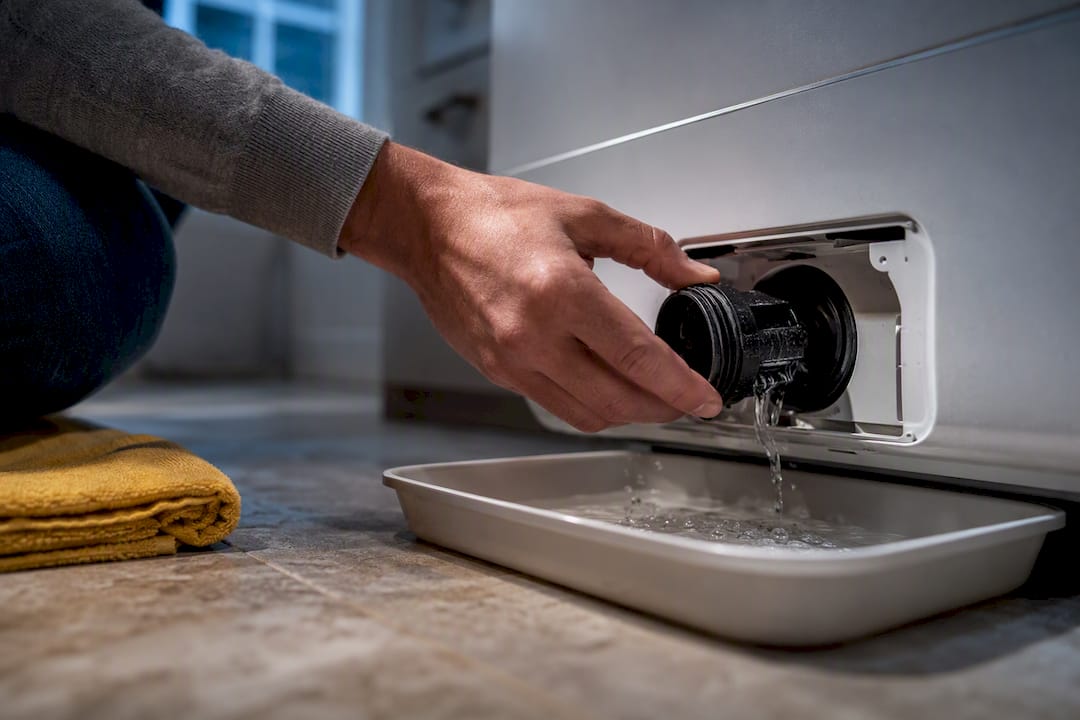
On front-loading machines, the pump filter sits behind a small access panel near the bottom front corner. Open it, place a shallow pan underneath (water will come out), and unscrew the filter cap slowly. Lint, coins, buttons, and the occasional sock all end up in there. Clean it out, check that the impeller behind it spins freely, and reinstall.
Manufacturers recommend cleaning the pump filter roughly once a month or every 40 washes, which is more often than most homeowners realize. If the filter is clear, check the drain hose itself. It should not be kinked, and it needs to sit at the correct height. Standpipe height and insertion depth are frequent installation mistakes, and an improperly set standpipe can cause siphoning that mimics a pump failure even though the washer itself works fine.
Unbalanced or overloaded drum
Washers are built to detect imbalance and correct it themselves before giving up. When one side of the load is heavier, the machine will often refill and rock the drum in an attempt to redistribute items automatically. If you hear that happening, let it run. Interrupting it early is a common mistake.
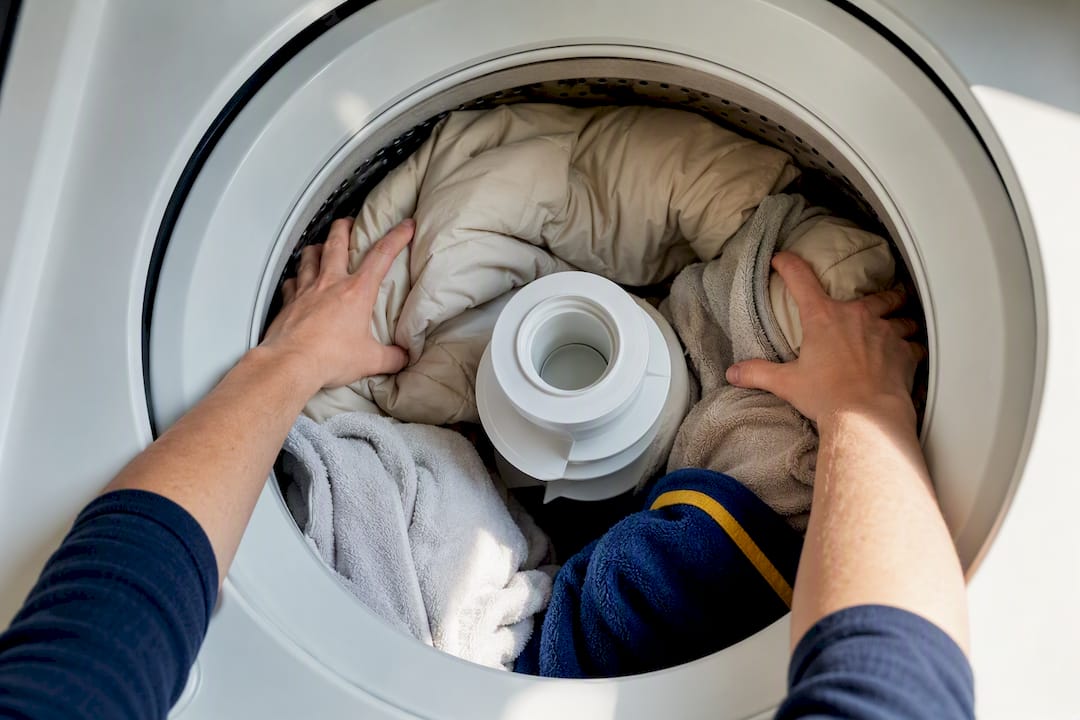
If the imbalance sticks around after that automatic attempt, open the lid, pull the laundry apart by hand, and spread it evenly around the drum. Bulky single items like a comforter or a stack of towels are the usual offenders since there’s nothing to balance them against. Running “Drain & Spin” afterward will finish the job without rewashing anything.
Cycle and spin-speed settings
This one trips up more homeowners than any mechanical fault. Delicate and hand-wash cycles are designed to spin at low speed or skip spinning altogether to protect fabric, and many washers hold onto the last-used cycle settings between loads. Clothes coming out soaking wet after a normal cycle usually means the machine defaulted to a low-spin option, not that anything broke.
Check the display for a spin-speed selector and bump it up. If the load already finished, select “Drain & Spin” to extract the remaining water without a full rewash.
Excessive suds or the wrong detergent
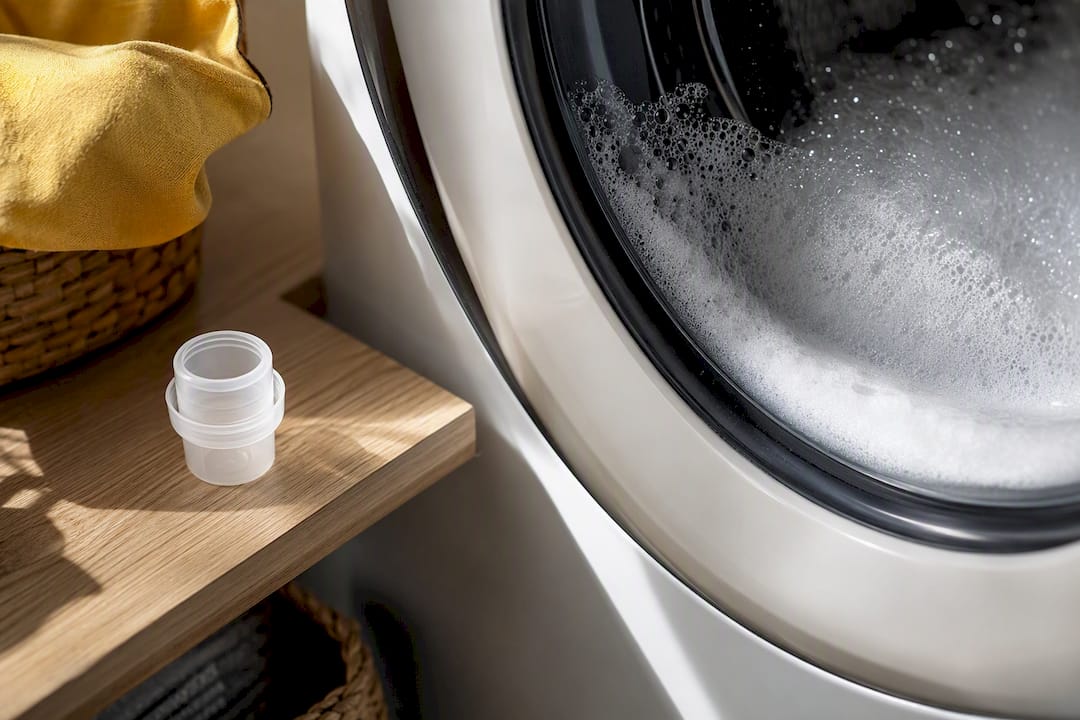
Too much detergent, or using standard detergent in a high-efficiency machine, creates a wall of suds that can trigger the washer’s internal sensors and shut down the spin step entirely. HE detergent is formulated to produce far fewer bubbles, and overdosing on any detergent can interfere directly with pump operation.
If you suspect suds are the problem, run an extra rinse cycle with no detergent added. That alone often clears the sensors and lets the next cycle spin normally.
Washer not level
A washer sitting even slightly off level vibrates harder during spin, and enough vibration can trip the same balance sensors that respond to an uneven load. Place a level on top of the machine, front to back and side to side, then adjust the leveling feet until it’s flat. Flexible subflooring, especially in upstairs laundry rooms, can throw off a washer that was perfectly level when installed.
Lid or door latch failures
- A latch that doesn’t click shut is one of the most overlooked reasons a washer won’t spin.
- Modern machines are designed so they will not spin at all if the lid or door lock doesn’t report as closed.
- Open and shut the door firmly and listen for the lock engaging.
- Check the latch mechanism itself for cracked plastic or a strike plate that’s shifted out of alignment.
If the latch looks fine but the washer still won’t lock, that’s a sign the switch itself has failed rather than the latch mechanism, which points toward a part replacement instead of a quick fix.
Electrical and motor problems
Error codes referencing the motor, drive system, or control board mean something has failed beyond a simple settings issue. If the washer trips your circuit breaker or you smell anything burning, stop immediately and unplug the unit rather than attempting further troubleshooting. These symptoms point to electrical faults that carry real shock and fire risk, and they’re outside the scope of any homeowner-safe fix.
Could Motor Coupling or a Drive Belt Be the Problem?
Top-load washers without direct-drive motors rely on either a motor coupling or a drive belt to transfer power from the motor to the drum. Both are wear parts, and both fail in a recognizable way: the washer runs, you can hear the motor humming, but the drum barely moves or doesn’t move at all.
A motor coupling is a small plastic or rubber piece that connects the motor shaft to the transmission. It’s designed to be a weak point on purpose. It breaks under overload stress so the motor itself doesn’t get damaged, similar to how a fuse protects a circuit. If yours has failed, you’ll often hear a grinding or rattling noise during the wash cycle, followed by a drum that agitates weakly or not at all during spin.
A drive belt failure shows up differently. If the belt has slipped off its pulley or snapped, you may hear the motor spin freely with no resistance, since there’s nothing connecting it to the drum anymore. A burning rubber smell sometimes accompanies a belt that’s slipping before it fully breaks.
Neither of these repairs is something most homeowners should attempt. Both require removing the outer cabinet or rear panel to access the transmission housing, and reassembly has to be done correctly or you risk a leak or a repeat failure. This is squarely a job for a technician with the right replacement parts on hand.
How Do You Test a Faulty Lid Switch or Door Sensor?
The lid switch (top loaders) or door sensor and latch assembly (front loaders) is a small but critical safety component, and a failed one produces symptoms that look exactly like a much bigger problem: the washer fills, agitates or washes normally, but refuses to spin at all.
Start with the obvious test. Close the lid or door and listen for a distinct click. On top loaders, you can often press down on the lid switch through the small opening near the hinge and listen for the same click you’d hear from closing the lid normally. If you don’t hear it, or the sound is inconsistent, the switch itself is likely worn out.
For a more definitive test, unplug the washer first, then locate the switch (usually near the lid hinge on top loaders, or built into the door latch assembly on front loaders). Using a multimeter set to continuity mode, test the switch with the lid closed versus open. A working switch shows continuity in one state and none in the other. No change at all means the switch has failed internally.
Replacement switches are inexpensive and often accessible without a full teardown on top-load models, which makes this one of the more approachable DIY repairs if you’re comfortable with a screwdriver and a multimeter. Front-load door latch assemblies tend to be more involved since the latch, switch, and sometimes the door strike are integrated into one unit that requires removing the front panel.
Transmission or Clutch Problems on Older Top-Load Washers
Older top-load washers, particularly belt-drive models built before direct-drive designs became standard, rely on a transmission and clutch assembly to shift between the slow agitation speed of the wash cycle and the much faster speed needed for spin. When that assembly wears out, the washer typically still agitates just fine but simply can’t shift into spin.
A worn clutch often announces itself with a distinct thumping or squealing noise right as the machine tries to transition into spin, followed by a drum that either doesn’t accelerate at all or spins up briefly before stalling. Grease and friction material inside the clutch assembly break down over years of use, and that gradual wear is why this tends to show up in machines that are already eight to ten years old rather than appearing suddenly.
Diagnosing a transmission or clutch issue usually means removing the cabinet and inspecting the assembly directly, since the symptoms overlap heavily with drive belt and motor coupling failures. This is not a five-minute check, and it’s not a repair most homeowners have the tools or experience to take on safely. Given the labor involved and the age of machines that typically develop this problem, it’s also worth asking a technician for a straightforward cost comparison between the repair and simply replacing the unit.
Diagnosing a Malfunctioning Timer or Control Board
When the mechanical parts all check out and the washer still won’t spin, the control board or timer assembly becomes the next suspect. This is the electronic brain that tells the motor when to run, how fast, and for how long, and when it malfunctions, the symptoms can be maddeningly inconsistent.
Watch for these signs of a control board issue:
- The washer starts a cycle but skips spin entirely, every single time, regardless of load or settings.
- Buttons on the control panel respond erratically or not at all.
- The display shows an error code that references the control board or main electronic control directly, rather than a mechanical part.
- The machine works fine for one full cycle, then fails intermittently on the next.
That intermittent behavior is actually a useful diagnostic clue. Mechanical failures like a broken belt tend to fail the same way every time. Electronic failures often come and go, sometimes clearing up temporarily after a power reset before returning a few cycles later. If a 60 second unplug fixes the problem once but it returns within a few loads, that’s a strong signal pointing toward the control board rather than a one-time glitch.
Testing a control board requires specialized knowledge of the specific model’s wiring diagram and diagnostic mode, and the boards themselves aren’t cheap. This is one repair where getting a professional opinion before ordering a part saves both money and frustration.
Checking and Testing the Washer’s Motor
A dead or dying motor is one of the less common causes of a no-spin washer, but it’s worth ruling out once you’ve checked drainage, balance, settings, and the lid lock. The telltale sign is silence. If you open the lid mid-cycle and hear no humming at all when spin should be starting, the motor itself may not be receiving power or may have failed internally.
Start by listening carefully during the spin attempt. A motor that hums but doesn’t turn the drum points toward a coupling or belt issue rather than the motor itself. A motor that produces no sound whatsoever suggests either no power is reaching it or the windings inside have burned out.
With the washer unplugged, you can visually inspect the motor for obvious signs of damage: scorched wiring, a burning odor coming directly from the motor housing, or visible corrosion on the connections. A multimeter can test for continuity across the motor windings, but interpreting those readings correctly takes some familiarity with the specific motor type, since results vary between models.
Pro Tip: If you smell anything burning near the motor housing, don’t run another test cycle to confirm it. Unplug the washer immediately and call a technician. A motor that’s already overheating can pose a fire risk.
Motor replacement is rarely a beginner-friendly repair. It involves disconnecting wiring harnesses, removing belts or couplings, and in many cases lifting the motor out from underneath the machine. Given the cost of a new motor and the labor involved, this is a case where getting a repair estimate before ordering parts makes financial sense.
Is a Blocked or Faulty Water Pump Stopping the Spin Cycle?
The water pump does double duty in most washers: it drains water out during the drain phase and, in many models, that draining has to complete successfully before the control board will authorize spin. A blocked pump doesn’t just leave water in the drum. It can trip a sensor that cancels spin as a protective measure, since spinning a drum full of water risks damaging the motor and bearings.
You already checked the pump filter in the quick checklist, and that solves the problem more often than not. But if the filter is clear and water still won’t drain, the pump itself may be failing. Listen during the drain phase. A healthy pump produces a steady humming sound as water drains out. A pump that clicks, buzzes, or grinds without moving water is likely jammed by debris further inside the housing or has a worn-out motor of its own.
A completely silent pump during drain, with no water leaving the drum at all, usually means the pump has failed electrically rather than mechanically. That distinction matters for repair, since a jammed pump might just need clearing out, while an electrically dead pump needs full replacement. Either way, accessing the pump typically means removing a front or rear panel, and testing it correctly requires checking both the electrical connection and physical rotation, which is a job better suited to a technician with the washer’s specific service manual on hand.
When to Call a Professional for Your Washer Not Spinning
Stop troubleshooting and call for service if you notice a burning smell, a breaker that trips repeatedly, a motor that produces no sound at all when spin should start, or an error code that keeps returning after a full power reset. Water still sitting in the drum after you’ve already cleared the filter and checked the hose is another clear signal that something beyond a homeowner-safe fix is going on.
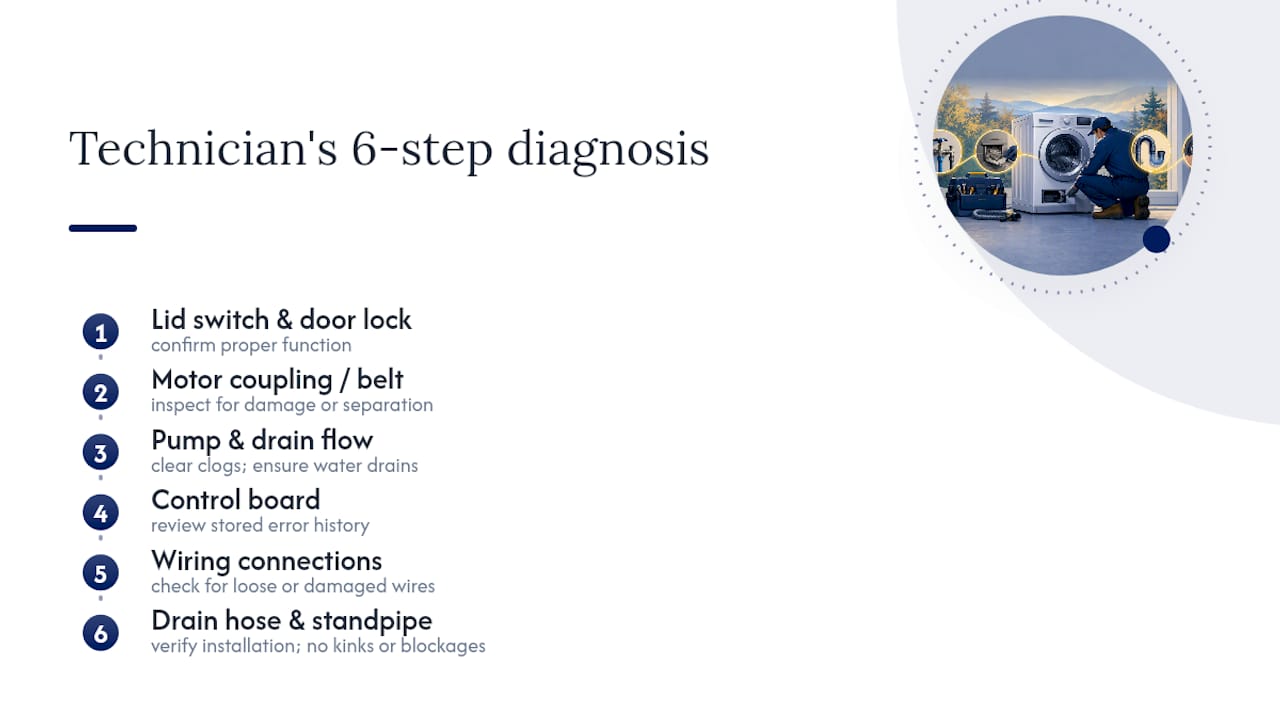
A technician arriving for a whirlpool washer not spinning or a similar spin cycle problem runs through a fairly consistent sequence: lid switch and door lock function, motor coupling or belt condition, pump operation and drain flow, control board error history, wiring connections, and the drain hose installation itself. That last check catches more problems than people expect, since even a professionally installed washer can develop a standpipe or hose issue over time.
Repair costs vary depending on what’s actually broken. Typical ranges run about $100 to $250 for drainage-related repairs, $100 to $300 for spin-related repairs, and $50 to $150 for balance issues, though the exact number depends on the part and labor involved. Getting an estimate upfront before any work begins is reasonable to expect from any appliance repair company.
Another Cycle Appliance Repair has spent nearly 20 years serving homeowners across Southern New Hampshire as a family-owned business, backed by a one-year warranty on parts and labor on every repair. Transparent pricing and a strong track record of five-star customer feedback come from showing up, diagnosing the problem honestly, and fixing it right the first time.
Before your appointment, have your washer’s model number ready (usually on a sticker inside the door or on the back panel), write down any error codes you’ve seen, note which troubleshooting steps you’ve already tried, and clear space around the machine so the technician has room to work.
— Rich
Preventive Maintenance That Reduces Future Spin Failures
A handful of simple habits catch most spin problems before they start. Building these into your regular laundry routine costs almost nothing in time and saves real money in avoided service calls.
- Clean the pump filter about once a month, or every 40 washes, whichever comes first, and empty pockets of coins and small debris before washing.
- Use HE detergent where your machine calls for it, and measure carefully rather than eyeballing an extra splash “for good measure.”
- Avoid washing a single bulky item alone. Pair a comforter or heavy blanket with a few towels so the load balances naturally.
- Keep the washer level, recheck the feet every so often, and confirm the drain hose height still matches manufacturer guidance, especially after any flooring work nearby.
- Run any manufacturer-recommended calibration or maintenance cycle occasionally to reset internal sensors and keep drainage running at full efficiency.
Pro Tip: Keep a small note taped inside a nearby cabinet listing your washer’s model number and the date you last cleaned the pump filter. It sounds unnecessary until you need it during a service call.
If you’re planning other home upgrades alongside appliance upkeep, a local resource like One Day Doors & Closets of New Hampshire handles door and closet installation work that often comes up during the same round of household maintenance.
Get Your Washer Fixed Right the First Time
Working through drainage, balance, and settings checks solves most spin problems without a service call. But when the fix requires opening the cabinet, testing a motor, or replacing a control board, that’s where a DIY attempt turns into a bigger repair bill than the original problem. Appliance repair services send experienced technicians to homes with diagnostic tools and parts on hand to fix spin cycle issues in a single visit, often backed by a warranty on parts and labor and pricing provided before any work starts.
That combination, in-home service, upfront pricing, and a real warranty, is what separates a lasting fix from a temporary patch. If your washer drum still won’t turn after working through the checks above, browse washing machine repair service details or head straight to scheduling a visit and get a technician on the calendar this week.
Sources
- Samsung: What to do if your washing machine is not spinning
- Is it Cheaper to Repair or Replace a Washing Machine? – Fred’s Appliance