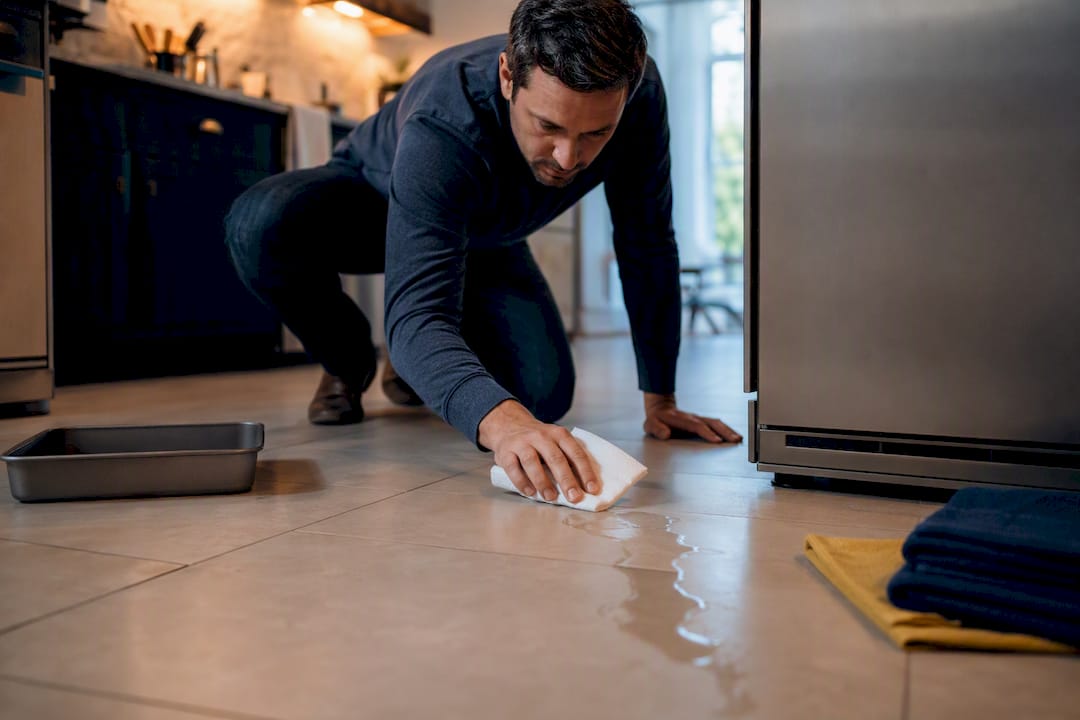
Most refrigerator leaks trace back to a clogged defrost drain, a cracked or loose water supply line, or a worn door gasket that lets in humid air. If water is pooling near the water line or inlet valve, shut off that line’s valve now. Mop up standing water, unplug the fridge only if you see water touching outlets or cords, and lay towels down while you work through the checks below.
TL;DR:
- Most refrigerator leaks are caused by a clogged defrost drain, cracked supply line, or worn door gasket, which can be identified through simple checks like the paper towel test.
- Clearing ice from the defrost drain with warm water and soft tubing resolves the most common cause, while inspecting supply lines and inlet valves helps detect more complex plumbing issues.
- Regular maintenance, such as flushing the defrost drain and replacing the water filter every six months, prevents the majority of leaks from developing over time.
- If water pools near electrical components or persists after DIY fixes, professional diagnosis is recommended to avoid damage or safety hazards.
- Replacing damaged parts like the water filter, drain pan, or gasket is usually straightforward and cost-effective, but complex leaks may require professional repair.
Table of Contents
- Why Is My Refrigerator Leaking Water? A Fast 5-Minute Checklist
- Common Causes of Refrigerator Plumbing Issues and Their Signs
- How to Trace and Fix a Fridge Leak Step by Step
- Fixing the Filter, Supply Line, Valve, Gasket, and Pan
- Preventive Maintenance That Stops Most Leaks Before They Start
- When to Call a Professional Technician
- What Years of Refrigerator Repairs Teach You About Leaks
- Get a Professional Fix Without the Guesswork
- Sources
- FAQ
Why Is My Refrigerator Leaking Water? A Fast 5-Minute Checklist
Run these checks before you pull out tools. Most point straight to the problem.
- Do the paper towel test. Lay dry paper towels along the front, back, and inside the fridge, then check in 10 minutes to see where fresh water actually shows up.
- Pull the fridge out a few inches and look at the supply line, the inlet valve, and every compression fitting for drips or corrosion.
- Open the freezer and check the back wall near the floor. A sheet of ice building over the drain hole is the single most common culprit.
- Pop out the water filter and reseat it. A filter that’s crooked, cracked, or the wrong model number will weep at the housing.
- Check that the fridge is level and confirm the drain pan underneath is still seated flush against the compressor.
- If you see active dripping from the water line or valve, shut off that supply now before you do anything else.
Pro Tip: Take a photo of exactly where the water shows up and jot down the time of day. If the leak happens only when the ice maker cycles, that timing alone points straight at the inlet valve rather than the drain.
Common Causes of Refrigerator Plumbing Issues and Their Signs
Six problems cause the overwhelming majority of refrigerator leaks, and each one leaves its own fingerprint.
- Clogged defrost drain. Water pools under the crisper drawers, and you’ll usually find a slab of ice building up on the freezer floor near the back wall. This is the most common cause repair technicians see, and it’s also the cheapest to fix yourself.
- Cracked or disconnected supply line, or a failing inlet valve. Water shows up behind the fridge or on the floor near the back. Whirlpool’s own troubleshooting guidance lists water connection problems as one of the three primary causes of floor puddles.
- Water filter problems. Drips concentrate right at the filter housing, or you’ll see moisture near the dispenser. Wrong filter size, a cracked housing, or a filter that’s simply overdue can all trigger this.
- Cracked or overflowing drain pan. Check under the kick plate at the bottom front of the fridge. A pan that’s slipped off its mount, or one that’s cracked from age, lets water spread across the floor instead of evaporating quietly.
- Worn door gasket. Look for condensation and small drips inside the fridge near the door threshold, especially at the bottom corners where the seal takes the most wear.
- Leveling or installation errors. If the fridge tips forward even slightly, the defrost drain can’t do its job, and water runs the wrong direction into the cabinet instead of into the drain pan.
Refrigerator leaking freezer symptoms almost always mean the defrost drain, since that’s the drain closest to the evaporator coils where frost naturally forms and melts during each defrost cycle. If you’re seeing water under the crispers instead, the leak is more likely traveling down from a clogged drain higher up in the freezer compartment, or from a gasket letting warm, humid air in that then condenses inside the cabinet.
How to Trace and Fix a Fridge Leak Step by Step
Start by clearing space to work safely. Unplug the fridge if water is anywhere near an outlet or power cord, lay towels or a shallow pan on the floor, and if you’re moving the unit, use furniture sliders or a helper rather than dragging it across flooring.
Run the paper towel test first. Fresh water inside the cabinet near the crispers usually means the defrost drain. Water behind the unit points to the supply line or inlet valve. Drips near the dispenser front point to the filter or reservoir connections.
1. Inside/under-crisper leaks: clear the defrost drain.
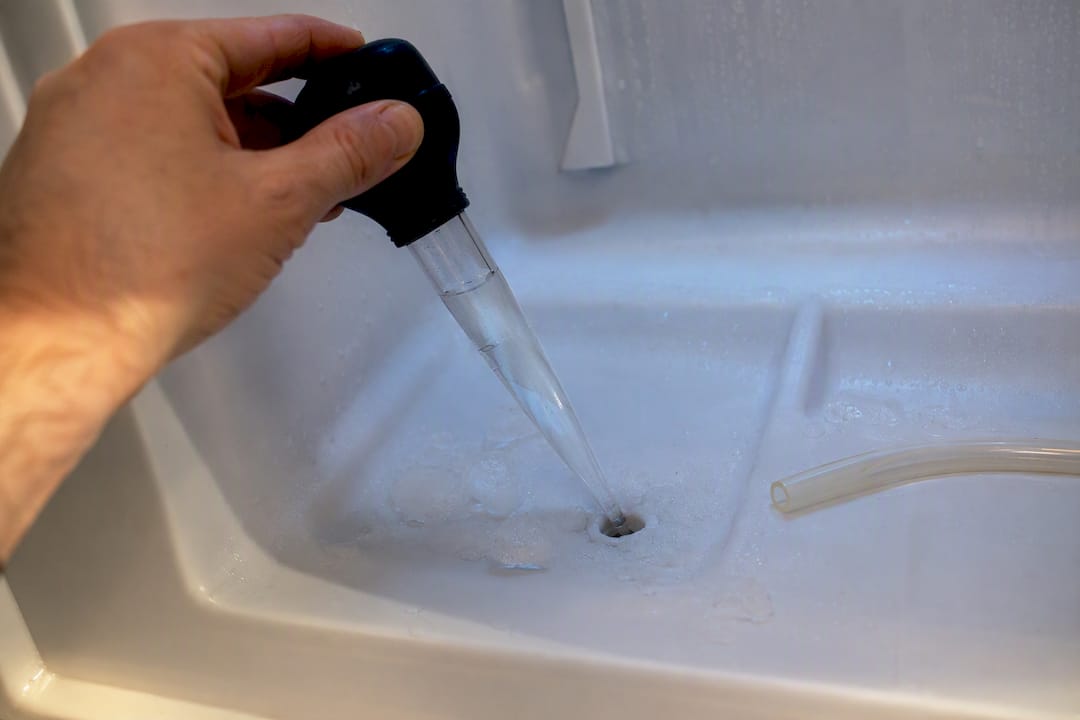
Pull out the freezer’s bottom drawer and locate the drain hole, typically a small opening in the back wall or floor of the freezer compartment. If you see ice covering it, use a turkey baster filled with warm (never boiling) water to melt the plug. Boiling water can warp or crack the plastic drain housing, so stick with warm tap water. Once it’s loosened, feed a length of soft plastic tubing or a pipe cleaner gently into the drain to clear any remaining debris, then flush again with warm water until it drains freely.
2. Back-of-fridge leaks: inspect the supply line and inlet valve.
Shut off the water supply at the shutoff valve behind the fridge or under the sink before touching anything. Inspect the plastic tubing for cracks, kinks, or yellowing, and check every compression fitting for slow drips. A loose fitting often just needs a quarter turn with an adjustable wrench. A cracked line needs replacement, which is covered in detail below.
3. Dispenser or ice maker leaks: flush and reseat.
Air trapped in the line after a filter change can cause dripping at the dispenser. LG’s support guidance recommends running several cups of water through the dispenser to purge trapped air, then checking the reservoir and every connection point for a proper seal. Reseat or replace the filter if it’s not fully clicked into place.
4. Drain pan issues: access, empty, and inspect.
Remove the kick plate at the base of the fridge, usually held by a couple of screws or clips, and slide out the drain pan. Empty it, check for hairline cracks, and confirm it seats flush when you slide it back in.
5. Gasket and condensation checks.
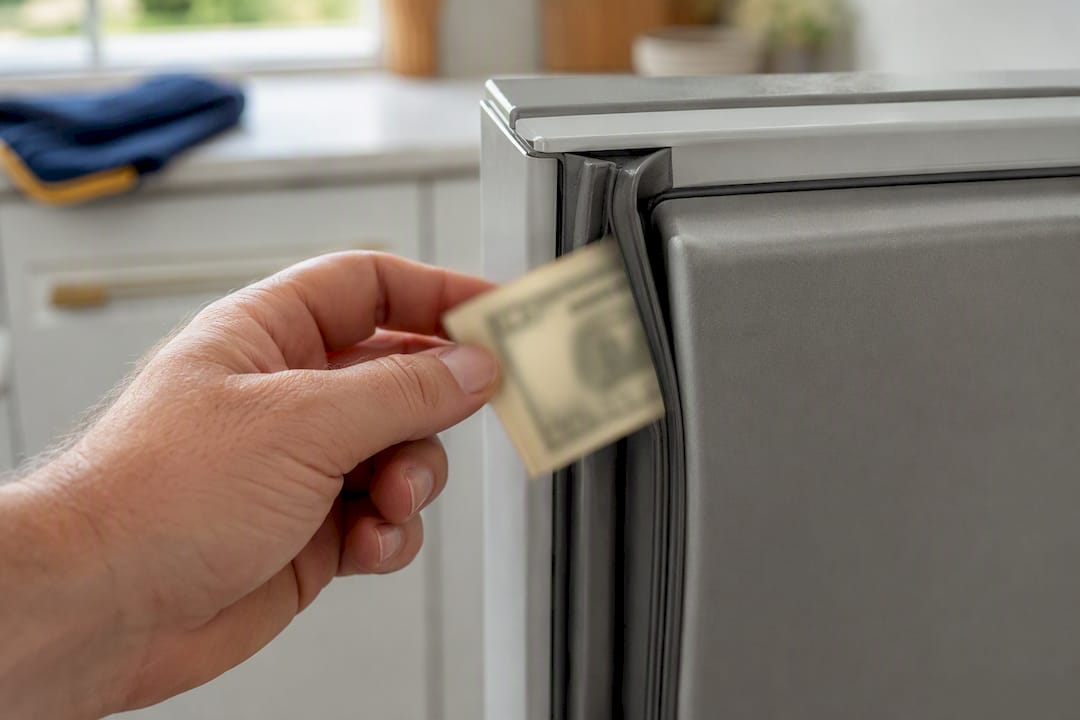
Close the door on a dollar bill at several points around the frame. If it slides out easily, the seal has gone soft or warped there. Clean the gasket with warm water and mild soap, then apply a thin coat of petroleum jelly to restore flexibility as a temporary fix.
6. Leveling.
Set a level on top of the fridge front to back and side to side. Most models have adjustable feet at the front corners. A slight backward tilt helps water drain into the pan instead of pooling under the unit.
Pro Tip: Never use boiling water on any plastic drain component. It’s the single most common mistake homeowners make trying a DIY fix, and it turns a $0 repair into a cracked drain housing that needs a replacement part.
Independent repair data backs up what you’re likely to find: clogged defrost drains account for the largest share of refrigerator leak calls, which is exactly why it’s the first thing worth checking every time.
Fixing the Filter, Supply Line, Valve, Gasket, and Pan
Once you know the source, the actual repair is usually straightforward and cheap.
- Water filter: Twist and pull the old filter, confirm the replacement matches your model number exactly, and push it in until it clicks. Manufacturers recommend swapping filters roughly every six months to avoid the cracking and improper seating that cause slow drips.
- Supply line: Shut off the water, disconnect the old plastic tubing at both ends, and run a new braided stainless-steel line in its place. Stainless lines resist the cracking and kinking that plague plastic tubing over time.
- Inlet valve: A valve that leaks only when the ice maker cycles, hums loudly, or won’t shut off fully usually needs replacement. This job involves accessing the valve behind a rear access panel, which is where many DIYers decide to call a technician instead.
- Door gasket: Clean and condition first. If the seal is torn or permanently warped, order the exact gasket for your model number and press the new one into the door channel starting at one corner and working around.
- Drain pan: Reseating a slipped pan takes minutes. A cracked pan needs full replacement, usually a low-cost part once you have the model number.
| Component | Typical DIY time | Typical part cost | DIY or call a pro |
|---|---|---|---|
| Water filter | 5 minutes | Low | DIY |
| Supply line | 30 minutes | Low to moderate | DIY if comfortable with basic plumbing |
| Inlet valve | 1-2 hours | Moderate | Often better left to a pro |
| Door gasket | 20 minutes | Moderate | DIY |
| Drain pan | 15 minutes | Low | DIY |
If a repair means disassembling the back panel near electrical or sealed-system components, that’s the point where a wrong move risks turning a small leak into an expensive one.
Preventive Maintenance That Stops Most Leaks Before They Start
A twice-a-year routine catches almost everything on this list before it turns into a puddle on the kitchen floor.
- Flush the defrost drain every six months, or sooner if you notice drainage slowing or ice building up faster than usual.
- Replace the water filter roughly every six months, following the schedule most manufacturers, including Whirlpool, recommend.
- Inspect supply lines during each seasonal check. Look for yellowing, brittleness, or kinks, and swap old plastic tubing for braided stainless-steel every 7 to 10 years before it fails on its own schedule.
- Keep the freezer organized so bags and containers don’t block the drain hole or the air vents that keep temperatures consistent.
- Do a spring and fall walk-around: check the gasket seal with the dollar-bill test, confirm the unit is still level, and wipe down the drain pan.
General appliance upkeep habits, like the kind covered in this guide to caring for wine coolers and specialty appliances, apply here too: small, regular checks beat waiting for a visible failure.
When to Call a Professional Technician
Some signs mean it’s time to stop troubleshooting and pick up the phone.
- The leak keeps coming back after you’ve cleared the drain and checked the fittings.
- Water is pooling near outlets, cords, or any electrical component.
- You notice brown or oily residue, or smell anything unusual near the compressor.
- You hear hissing or smell a chemical odor, which can signal a refrigerant issue in the sealed system.
- You have a built-in unit with a drain routed somewhere inaccessible without disassembly.
A technician will typically test the inlet valve under pressure, inspect the evaporator coil and defrost heater, replace supply valves or lines as needed, and run sealed-system diagnostics if refrigerant is suspected. Before the visit, ask about the warranty on parts and labor, whether there’s a diagnostic fee, and a realistic timeframe for the repair. Persistent or hazardous leaks are exactly the cases where professional troubleshooting saves more money than it costs.
What Years of Refrigerator Repairs Teach You About Leaks
Most leak calls turn out to be one of the same three or four problems, over and over. A clogged drain, a tired gasket, or a supply line that’s finally given out after a decade of quiet service. What surprises a lot of homeowners is how rarely the fix is complicated. It’s usually the diagnosis that takes the time, not the repair.
Routine maintenance genuinely prevents most of this. A drain flushed twice a year almost never freezes solid enough to cause a flood. A filter swapped on schedule almost never cracks at the housing. The leaks that turn expensive are the ones that got ignored for months, where water sat under the crisper long enough to warp a shelf or drip into the insulation behind the wall.
This service provider has experience working on refrigerators and offers a one-year warranty on parts and labor, with pricing explained before any work starts. That transparency matters more to most homeowners than any single repair technique.
One habit worth adopting before any service call: photograph the leak location and note when it happens, whether it’s constant or only during the ice maker cycle. That single detail often cuts diagnostic time in half.
— Rich
Get a Professional Fix Without the Guesswork
If you’ve worked through the checklist above and the leak keeps coming back, or you’d rather skip the trial and error entirely, This service offers in-home diagnosis with clear pricing quoted before any work begins, providing professional troubleshooting backed by a warranty on parts and labor.
It makes the most sense to call when the leak returns after DIY attempts, when water shows up near anything electrical, or when you’re dealing with a built-in model with a drain you can’t reach. Before scheduling, grab those photos and notes on when the leak happens. It helps the technician diagnose faster on-site. You can review the refrigerator repair services offered or schedule a visit online whenever you’re ready.
Sources
- What to do if there is water on the floor – Product Help | Whirlpool
- When to Change the Water Filter | Whirlpool product help
- LG Refrigerator troubleshooting – leaking refrigerator | LG USA Support
- Fridge Leaking Water? DIY Fix Guide | Axis Appliance Repair
- Why your refrigerator is leaking water (and how to fix it) | Lifehacker
FAQ
Why is my refrigerator leaking water onto the floor?
The most common causes are a clogged defrost drain, a cracked or loose water supply line, a failing inlet valve, or a worn door gasket letting in humid air that condenses inside the cabinet.
How do I get my refrigerator to stop leaking water?
Identify the source with the paper towel test, then clear the defrost drain with warm water and soft tubing, tighten or replace a damaged supply line, or reseat the water filter and drain pan depending on what you find.
Where is the defrost drain located on a refrigerator?
It’s typically a small hole in the back wall or floor of the freezer compartment, just behind the bottom drawer, that channels defrost water down into the drain pan under the fridge.
How do I know if my refrigerator leak is serious?
Treat it as serious if water pools near electrical outlets or cords, if you smell a chemical odor or hear hissing, or if the leak keeps returning after you’ve cleared the drain and checked the fittings, since those signs often point to an inlet valve or sealed-system problem better handled by a technician.