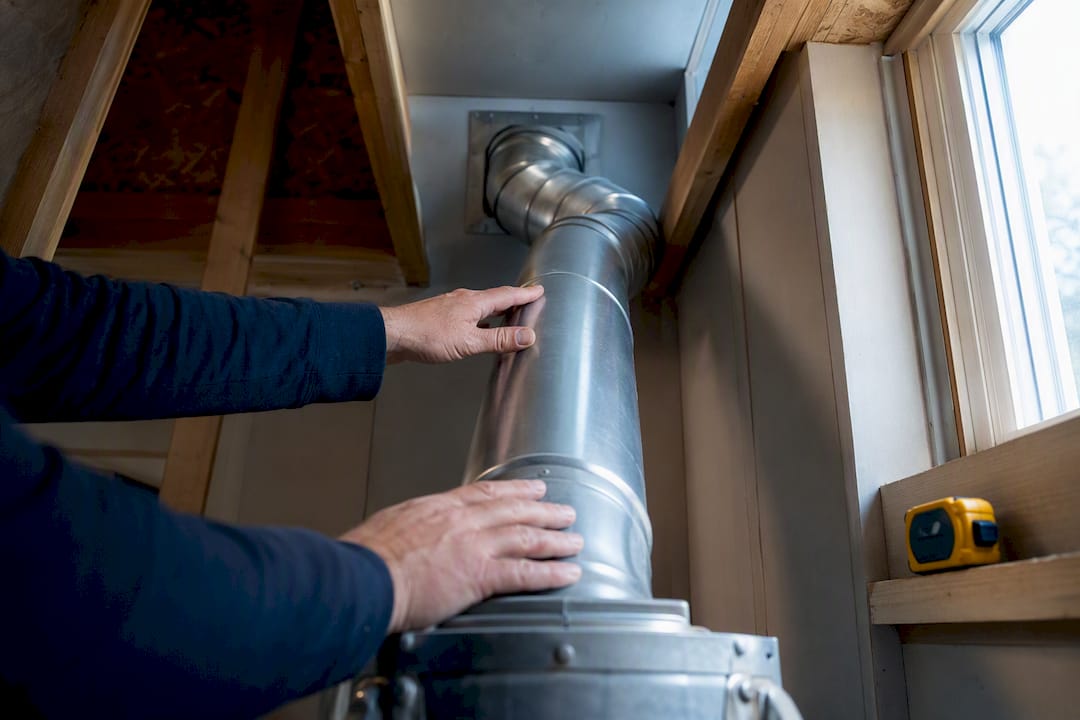
The maximum dryer vent length under the International Residential Code is 35 feet of equivalent length for a standard 4-inch smooth rigid duct, but that number shrinks fast once elbows enter the picture, and it shrinks further if your dryer’s manufacturer sets a tighter limit. Check the installation manual before you measure anything. Whichever number is smaller, the manufacturer’s or the code’s, is the one that governs your install.
TL;DR:
- The maximum allowable duct length is 35 feet of equivalent length for rigid 4-inch smooth duct, but manufacturer limits can mandate shorter runs.
- Each 90-degree elbow deducts five feet from the length allowance, while a 45-degree elbow deducts two and a half feet, significantly reducing the possible straight run.
- Rigid galvanized steel or aluminum duct is the only compliant material inside walls, ceilings, and floors, with plastic or vinyl ducts explicitly prohibited for safety reasons.
- Exceeding the limit or failing to use a permanent label to document a longer run can cause inspection failures, especially if the manufacturer’s limit is more restrictive than the code.
- Regular inspection and cleaning are necessary for longer or angled vent runs, with professional assistance recommended for any uncertainty or unsafe conditions.
Table of Contents
- What Does the IRC Say About Maximum Dryer Vent Length?
- How Do You Calculate Equivalent Length for a Dryer Vent?
- Which Duct Materials Meet Dryer Vent Code Requirements?
- Why Does a Too-Long Vent Hurt Performance and Safety?
- How Do You Fix a Dryer Vent That’s Too Long?
- Do Local Codes Change the Maximum Dryer Vent Length?
- How Often Should a Long Dryer Vent Be Inspected?
- What Do Local Pros See That Homeowners Miss?
- When Should You Call a Pro for Dryer Vent Work?
- Sources
What Does the IRC Say About Maximum Dryer Vent Length?
Section M1502.4.6.1 of the IRC sets the default at 35 feet of equivalent length, measured from the dryer’s transition connection to the point where the duct terminates outside. That 35-foot figure is not a straight-line distance. It is a total that has to absorb every bend in the duct, and the code provides exact deductions for each type of fitting.
Manufacturer instructions can cut that allowance down. Some residential dryers ship with installation manuals capping the run shorter than the code default, and when that happens, the shorter number wins. The IRC explicitly defers to whichever limit is more restrictive, so a code-compliant 35-foot run can still fail inspection if the dryer itself was never rated for anything past 25.
There’s also a documentation requirement that trips up a surprising number of otherwise solid installs. If the calculated equivalent length runs past 35 feet under a manufacturer’s specified-length exception, the code requires a permanent label within 6 feet of the dryer’s connection point stating that equivalent length. Inspectors look for it. If it’s missing, expect a callback.
A few things worth locking in before you touch a tape measure:
- The 35-foot default applies specifically to 4-inch smooth rigid duct, not flexible transition hose.
- The manufacturer’s printed limit always overrides the code default when it’s shorter.
- Exceeding 35 feet under a manufacturer allowance requires a permanent equivalent-length label near the dryer.
- Bring the installation manual to any inspection. Inspectors ask for it, and its absence is one of the more common reasons a job gets flagged.
How Do You Calculate Equivalent Length for a Dryer Vent?
Equivalent length is not the tape-measure distance from your dryer to the outside wall. It’s a calculated figure that accounts for the extra resistance every bend adds to the airflow, and it’s the number code officials and manufacturers actually care about.
The standard deductions, according to BASC/PNNL’s venting guide, are straightforward:
- Measure the straight-line run of rigid duct in feet.
- Subtract 5 feet from your 35-foot allowance for every 90-degree elbow in the run.
- Subtract 2.5 feet for every 45-degree elbow.
- Add up the remaining allowance. That’s your maximum straight-run distance for the fittings you have.
- Don’t count the flexible transition duct connecting the dryer to the wall box. Under the specified-length method, that piece is excluded from the total.
Long-radius elbows cost you less than tight, mitered ones, which is why swapping fitting types is often the cheapest fix on a run that’s borderline.
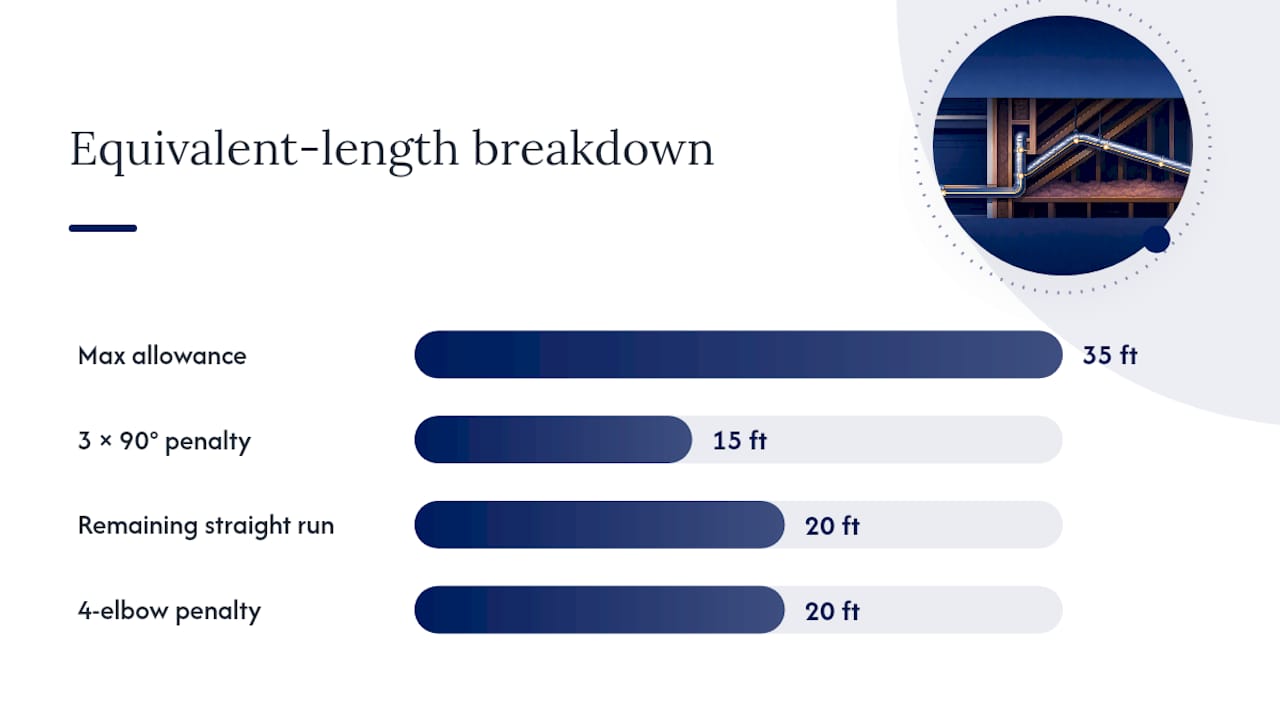
Here’s what the penalties look like in practice:
Run the numbers on a typical basement install: say you’ve got three 90-degree elbows getting the duct from the dryer, up through a joist bay, and out an exterior wall. That’s 15 feet gone from your 35-foot budget before you’ve laid a single foot of straight pipe, leaving 20 feet of usable rigid duct. A vent with four elbows can eat 20 feet on its own, which is why so many “code compliant” runs on paper end up failing once someone actually counts the bends.
Which Duct Materials Meet Dryer Vent Code Requirements?
Smooth rigid metal, either galvanized steel or aluminum, at a minimum 4-inch diameter is what the code requires for any concealed dryer exhaust run. That’s the only material allowed inside walls, floors, or ceilings.
The IRC’s exhaust systems chapter prohibits plastic or vinyl corrugated duct outright. It’s a fire hazard, it collapses under its own weight over time, and its ridged interior grabs lint the way rigid duct never does. If you see white plastic accordion hose running behind a dryer, that’s a code violation waiting to be found at resale or insurance inspection.
Transition ducts, the short flexible section connecting the dryer to the wall or floor box, get their own set of rules:
- They must stay visible and accessible, never buried inside a wall cavity as a permanent run.
- They need to be a listed product rated for dryer exhaust use, not generic flex duct.
- Length is typically capped in the single digits of feet, and manufacturer instructions set the exact figure.
- Rigid duct needs support roughly every 4 feet and clearance from anything combustible.
- Wherever screws or nails could pierce the duct wall, added protection is required.
Exterior terminations have their own hard rule: no screens. A screen catches lint and clogs within a season, defeating the whole point of the vent. The termination needs a damper that opens freely under exhaust pressure and closes when the dryer isn’t running.
Why Does a Too-Long Vent Hurt Performance and Safety?
Every extra foot of duct, and every elbow you add, robs the exhaust fan of static pressure. The dryer’s blower has a fixed capacity to push air. Once resistance climbs past what it can overcome, dry times stretch out, energy use climbs, and the heating element runs longer per cycle than it was designed to.
That extra runtime does more than raise your electric bill. Longer exhaust travel gives moist air more time to cool inside the duct, and condensation mixes with airborne lint to form a damp sludge that clings to the duct walls. That buildup is a documented contributor to the class of incidents NFPA tracks in its home fire statistics for clothes dryers, and restricted airflow is one of the most common mechanical precursors NFPA identifies in those reports.
Watch for these signs that a vent run has outgrown its allowance:
- Drying cycles that now take two runs to finish a load that used to take one.
- Visible lint collecting at the exterior outlet or damper.
- The dryer cabinet or exhaust duct feeling noticeably hot to the touch.
- A thermal fuse or high-limit switch that keeps tripping and needing replacement.
Pro Tip: If your dry times have crept up gradually over a year or two, don’t assume the dryer is dying. Check the vent first. A clogged or oversized run is a far more common culprit than a failing heating element.
How Do You Fix a Dryer Vent That’s Too Long?
Bringing an out-of-spec run into compliance is usually a matter of subtraction, not replacement. Here’s the order that actually solves the problem instead of masking it:
- Measure the developed length. Walk the actual duct path, count every fitting, and calculate the equivalent length using the deductions above before deciding anything needs to change.
- Shorten or reroute where possible. If the dryer can move closer to the exterior wall, or the duct can take a more direct path, that beats adding hardware every time.
- Replace any corrugated or crushed sections with smooth rigid metal. A kinked flexible section anywhere in the run adds resistance that’s easy to eliminate.
- Swap standard elbows for long-radius elbows. Long-radius fittings cost less equivalent length than tight ones, and on a borderline run, this alone can restore compliance without moving a single foot of duct.
If the calculated length still exceeds both the code default and the manufacturer’s limit after those steps, a listed dryer exhaust power ventilator may be the answer, but only a unit specifically listed for dryer exhaust use, installed exactly per its own instructions. A generic inline booster fan bought off a hardware store shelf is not an approved substitute and will fail inspection.
Once the vent is compliant, keep it that way: clean the full duct run at least once a year, and check the exterior damper every few months for lint buildup that restricts its swing.
Do Local Codes Change the Maximum Dryer Vent Length?
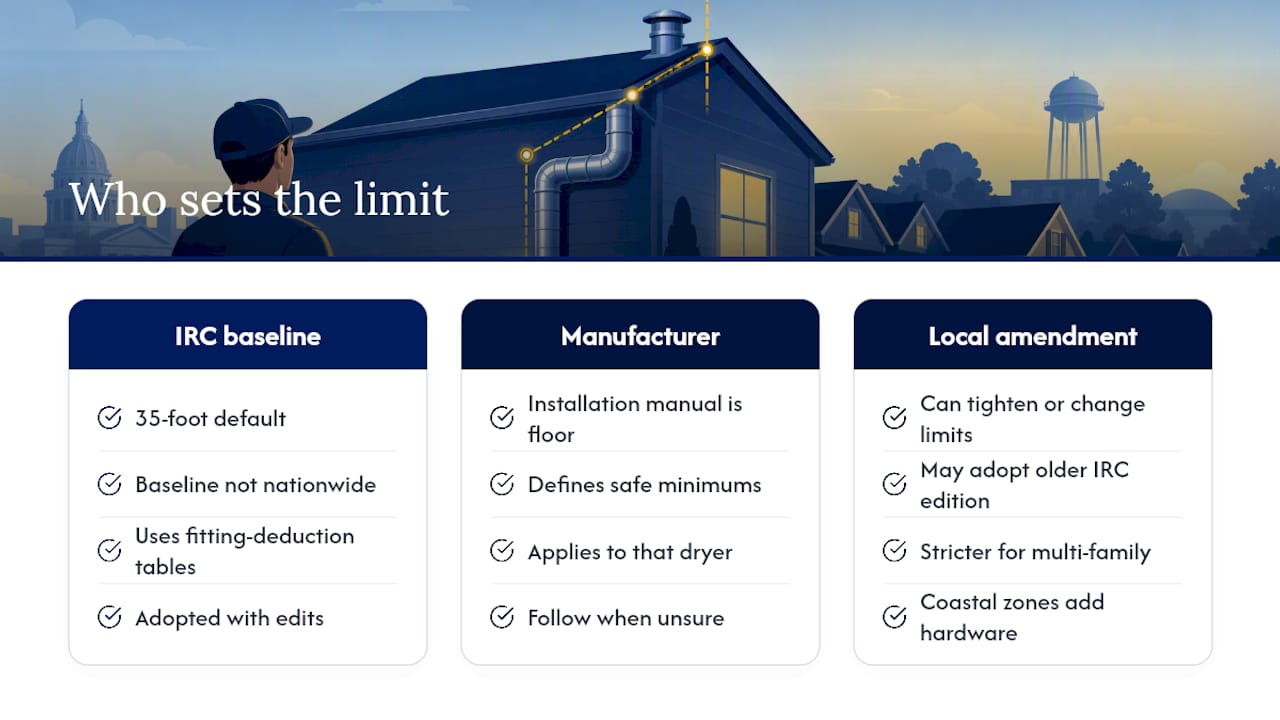
The IRC’s 35-foot default is a baseline, not a nationwide mandate carved in stone. States and municipalities routinely adopt the IRC with local amendments, and dryer exhaust length is one of the sections that gets tweaked more often than people expect.
Some jurisdictions adopt older IRC editions that use slightly different fitting-deduction tables. Others layer on stricter local fire codes for multi-family construction, where a shared chase serving several units might carry tighter equivalent-length limits than a single-family install would ever face. Coastal and high-wind zones sometimes add specific termination hardware requirements beyond the base code’s damper rules.
The practical result: two houses in neighboring towns can face different maximum vent lengths for functionally identical dryers, and neither homeowner is wrong. Your town or county building department maintains the amended version that actually applies to your permit, and it’s worth a phone call before you finalize a long or complicated run. This matters most in older housing stock, where a previous owner’s vent work may have been done under a code edition that’s since been superseded, meaning what passed inspection a decade ago might not pass today.
When in doubt, treat the manufacturer’s installation manual as your floor, and confirm the local amendment as your ceiling. Building departments are generally willing to clarify amendment specifics over the phone without requiring a formal filing.
How Often Should a Long Dryer Vent Be Inspected?
A vent run at or near the 35-foot equivalent-length maximum earns closer attention than a short, straight shot to an exterior wall. The general guidance for any household is an annual full cleaning, but a long run with multiple elbows deserves a visual check twice a year, since lint accumulates faster in a duct that’s already working harder to move air.
Households running the dryer daily, homes with pets that shed heavily, and anyone with a run exceeding 25 feet should treat inspection as a quarterly habit rather than an annual one. Check the exterior termination for lint buildup, confirm the damper still swings freely, and feel for excess heat around the duct during a cycle. Any of the warning signs covered earlier, stretched dry times, a hot duct, a tripped thermal fuse, mean the interval needs to shrink further, not wait for the next scheduled check.
What Do Local Pros See That Homeowners Miss?
Most compliance failures we run into aren’t dramatic. They’re a hidden 90-degree elbow tucked behind a wall that never got counted, a flexible duct crushed flat where furniture backs against it, or an exterior cap someone screened over to keep bugs out, not realizing it chokes the whole system. Inspectors ask for the dryer manual because the manufacturer’s limit often beats the code’s, and skipping that check risks a warranty denial down the line. Experienced professionals have encountered exactly these issues across Southern New Hampshire homes, with repairs often backed by a one-year warranty on parts and labor.
— Rich
When Should You Call a Pro for Dryer Vent Work?
Once you’ve mapped your run and the numbers still don’t add up, or you’re staring at a hot duct and don’t want to gamble on a DIY fix, that’s the point to bring in a professional rather than keep guessing. Professionals handle the full range of what a non-compliant vent run actually needs: measuring and calculating equivalent length correctly, replacing crushed or corrugated sections with smooth rigid duct, installing terminations that meet code, and full professional vent cleaning for runs that have been neglected too long.
Have your dryer’s installation manual on hand before a visit. It’s the first thing a technician checks, since it may set a tighter limit than the code itself. You can review the full scope of dryer repair and vent services or head straight to scheduling an inspection if your vent is already showing the warning signs covered above. Service covers homes across Southern New Hampshire, with clear pricing and a one-year warranty on parts and labor.
Sources
- Proper clothes dryer venting (BASC / PNNL resource guide)
- Home fires involving clothes dryers and washing machines (NFPA research report)
- 2021 International Residential Code excerpt on dryer exhaust duct length and power ventilators