If your dryer runs but produces no heat, start with the lint trap and the outside vent, then check the thermal safety fuse. Those two areas cause the overwhelming majority of no-heat calls. Shut off the power (or the gas valve on a gas dryer) before touching anything inside the cabinet. If airflow and the fuse check out clean, you’re likely looking at a failed heating component or thermostat, and it’s time to either run a multimeter test or call a technician.
TL;DR:
- The most common cause of a dryer running cold is airflow restriction caused by a clogged lint filter or vent duct, which also risks blowing the thermal fuse.
- Testing the thermal fuse with a multimeter is the first electrical step, as a blown fuse is a frequent, easily fixable failure point after clearing vent blockages.
- Conduct quick checks such as cycle setting, lint screen, vent airflow, circuit breaker reset, and power cord condition before opening the dryer cabinet.
- Diagnosing electrical components involves checking the heating element, thermostats, and circuit voltage, with a focus on the fuse first, then more complex parts if necessary.
- Emergency signs like gas smell, burning odors, or sparking require immediate professional intervention, and complicated repairs like control board or gas valve coil replacement are best handled by technicians.
Table of Contents
- Why Is My Dryer Cold? The Most Common Causes Ranked
- Quick Checks You Can Run Right Now
- How Do You Diagnose a Dryer That Won’t Heat?
- When Should You Call a Dryer Repair Technician?
- What Repair Techs Actually See in the Field
- Get Your Dryer Heating Again Without the Guesswork
- Sources
Why Is My Dryer Cold? The Most Common Causes Ranked
Most no-heat problems fall into a handful of categories, and they tend to show up in a predictable order of likelihood. Understanding which one you’re dealing with saves you from replacing a part that was never broken.
- Airflow restriction. A packed lint screen, a crushed vent duct, or a long run with too many bends chokes exhaust flow. A clogged lint screen or blocked vent is the most common cause of poor drying performance, and it’s also the top reason thermal fuses blow in the first place. The dryer overheats internally, the fuse sacrifices itself to prevent a fire, and now you’ve got no heat at all.
- A blown thermal fuse or thermal cutoff. These are one-time safety devices. Once they trip from overheating, they don’t reset. They have to be replaced, and replacing one without fixing the airflow problem that killed it just sets up round two.
- Electric heating element failure. The coil can burn open, or it can short against the metal housing (called a short to ground). Either way, no resistance heat gets generated.
- Partial voltage from the breaker. Electric dryers can run on partial voltage if one leg of a two-pole breaker has tripped. The motor spins fine on 120V, but the heating element needs the full 240V and never fires.
- Gas igniter or valve coil failure. On gas models, a weak igniter or failed valve coils commonly produce a telltale pattern: the dryer heats briefly, then quits, cycle after cycle.
- Cycling thermostat or hi-limit thermostat problems. These regulate temperature during the cycle and cut power if things run too hot. A stuck-open thermostat can shut heat down permanently.
- Miscellaneous failures. Worn timer contacts, a bad centrifugal switch, or a damaged power cord or terminal block can all mimic a heating problem even though the heat source itself is fine.
Electric and gas dryers heat differently, but the same root cause shows up on both: restricted airflow is the systemic problem that quietly takes out other components. Fix the vent first, every time, before you chase anything electrical.
Quick Checks You Can Run Right Now
Before opening the cabinet or reaching for a multimeter, run through these five checks. They resolve a large share of “dryer not drying clothes” complaints without a single tool.
- Check the cycle setting. Make sure you haven’t accidentally selected “Air Only,” “Fluff,” or an Eco mode that runs cooler by design.
- Pull and clean the lint screen. Lint buildup restricts airflow even when the screen looks mostly clear. Wash it with warm water and dish soap every few months to clear the fine film that regular wiping misses.
- Inspect the exhaust vent. Pull the dryer away from the wall, start a cycle, and feel the outside vent hood after a few minutes. Warm, steady airflow is a pass. Weak or no airflow points to a kink, a crushed duct, or a nest blocking the line.
- Reset both breaker poles. Flip the dryer’s breaker fully off, then back on, hitting both sides of a two-pole breaker. This rules out the half-voltage issue that leaves the motor running with no heat.
- Check the cord and terminal block. With power off, look for scorch marks, melted insulation, or a loose connection at the plug and terminal cover.
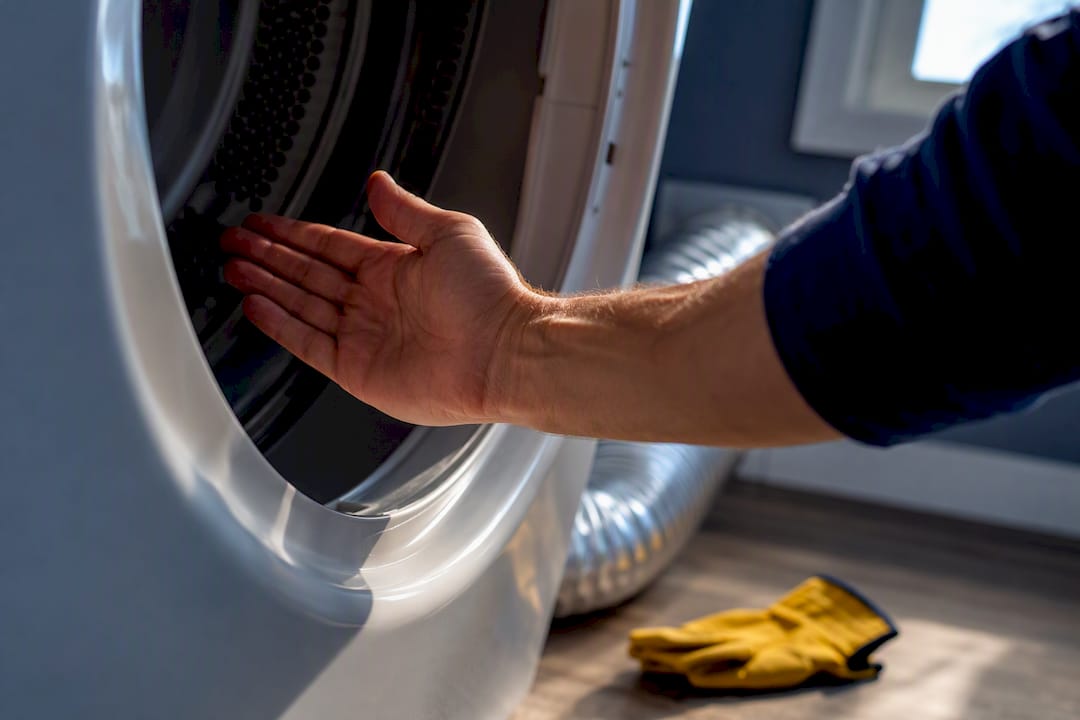
Pro Tip: Run a bare five-minute timed cycle and hold your hand near the drum opening. If you feel zero warmth at all, you’ve confirmed a true no-heat fault rather than a slow-drying issue, and that focuses your next steps.
Manufacturer guidance backs this exact test as a fast way to confirm whether the dryer is producing any heat before you go further. If you smell gas, smell burning, or see sparks at any point, stop immediately and call a technician. Don’t troubleshoot past that line.
How Do You Diagnose a Dryer That Won’t Heat?
Once the easy checks are done and the dryer still runs cold, it’s time for a multimeter and a specific order of operations. Technical troubleshooting guides put the sequence at thermal fuse first, then heating element or igniter, then thermostats, then breakers, then control board, and that order isn’t arbitrary. It goes from cheapest and most common to most expensive and least common.
Start with the thermal fuse. Unplug the dryer or shut off its breaker completely. Locate the fuse (usually on the blower housing or near the heating element), disconnect it, and touch multimeter probes to both terminals with the meter set to continuity or low-ohms mode. A steady beep or a reading near zero ohms means it’s fine. No reading means it’s blown and needs replacement. Testing the thermal fuse for continuity identifies the root cause in a large share of no-heat cases, which is exactly why it’s step one, not step three.

For electric dryers: test the heating element for continuity across its terminals (expect a low-ohm reading, not zero and not infinite) and check for a short to the metal housing. Then test the cycling thermostat and hi-limit thermostat the same way. If the element and thermostats read fine but the dryer still won’t heat, suspect the partial-voltage issue and confirm both breaker legs are delivering power.
For gas dryers: watch the igniter through the burner access panel during a cycle. A weak igniter or bad gas valve coils commonly cause the “heats briefly, then stops” pattern. A glowing igniter that never opens the gas valve usually means bad coils; an igniter that never glows at all usually means the igniter itself is dead.
- If the fuse is blown, clear every inch of vent blockage before installing the replacement, or you’ll blow the new one too.
- If the element is open, replace it and re-check airflow at the same time.
- If the igniter cycles but the burner never lights, the coils are the likely culprit.
Metering actual igniter current to tell a weak igniter apart from bad valve coils is a job for trained hands. It requires specialist equipment and careful judgment, and any test involving the gas valve itself, internal wiring, or a control board should go to a licensed technician rather than a home fix.
When Should You Call a Dryer Repair Technician?
Some signals mean stop testing and pick up the phone immediately: a gas smell, a burning odor, visible smoke, or sparking anywhere near the cord or terminal block. None of those are DIY situations.
Beyond the emergency cases, certain repairs are usually better left to a pro even when there’s no immediate danger. Gas valve coil replacement, a heating element buried behind a hard-to-reach panel, control board swaps, and any wiring or terminal block repair all fall into that category. Parts themselves are often inexpensive; what adds up is the labor and the risk of getting it wrong on a gas or 240V appliance.
| Situation | Typical scope |
|---|---|
| Blown thermal fuse, clean vent | Small part, straightforward swap |
| Vent blockage causing overheating | Cleaning plus fuse replacement |
| Failed heating element | Moderate labor depending on access |
| Gas valve coils or igniter | Technician recommended |
| Control board failure | Higher cost, technician required |
Before the technician arrives, have the model and serial number ready, along with a rundown of what you’ve already checked: airflow test results, whether you reset the breaker, and any continuity readings you took. Ask about their experience with your brand, whether replacement parts carry a warranty, and whether dryer vent cleaning is part of the visit. A tech who cleans the vent while they’re in there is solving the cause, not just the symptom.
What Repair Techs Actually See in the Field

Most no-heat service calls come down to two things: a choked vent and a blown thermal fuse. The order matters more than people expect. Replacing a fuse without clearing the vent that killed it just sets up a repeat failure, sometimes within weeks. Airflow gets verified first, every time, before any part gets swapped.
Homeowners tend to assume a cold dryer means an expensive part failed. Often it means lint won. Anothercycleappliance backs every dryer repair with a one-year warranty on parts and labor, and we tell every customer to hang onto their service record. It saves time on the next visit, and it’s proof of what’s already been ruled out.
— Rich
Get Your Dryer Heating Again Without the Guesswork
A weekend of swapping parts you’re not sure about costs more than one diagnostic visit that finds the actual problem the first time. Anothercycleappliance sends a technician to your Southern New Hampshire home who checks airflow, tests the thermal fuse, and isolates the failing part on the spot, backed by a one-year warranty on parts and labor.
On a typical visit, we run the diagnostic, give you a clear parts estimate, and often complete the repair the same day if the part is in stock. Before you call, jot down your dryer’s model and serial number, describe the symptom (cold air, brief heat then nothing, or total no-heat), and mention any checks you’ve already run. It helps us move faster once we’re on-site. For broader ductwork and airflow safety background, the emergency furnace repair checklist from Strong Heating and Cooling covers similar ventilation principles worth knowing.
Ready to get it fixed right? Schedule your dryer repair or browse our full range of appliance services to see what else we cover in your area.
Sources
- Dryer Not Heating: Complete Diagnostic Guide for Every Fuel Type | ServiceMag
- Why Is My Dryer Not Heating? | Maytag
- Electric Dryer Not Heating – iFixit Troubleshooting
- Gas dryer won’t heat troubleshooting video | Sears PartsDirect
- Electric Dryer – Runs But Does Not Heat