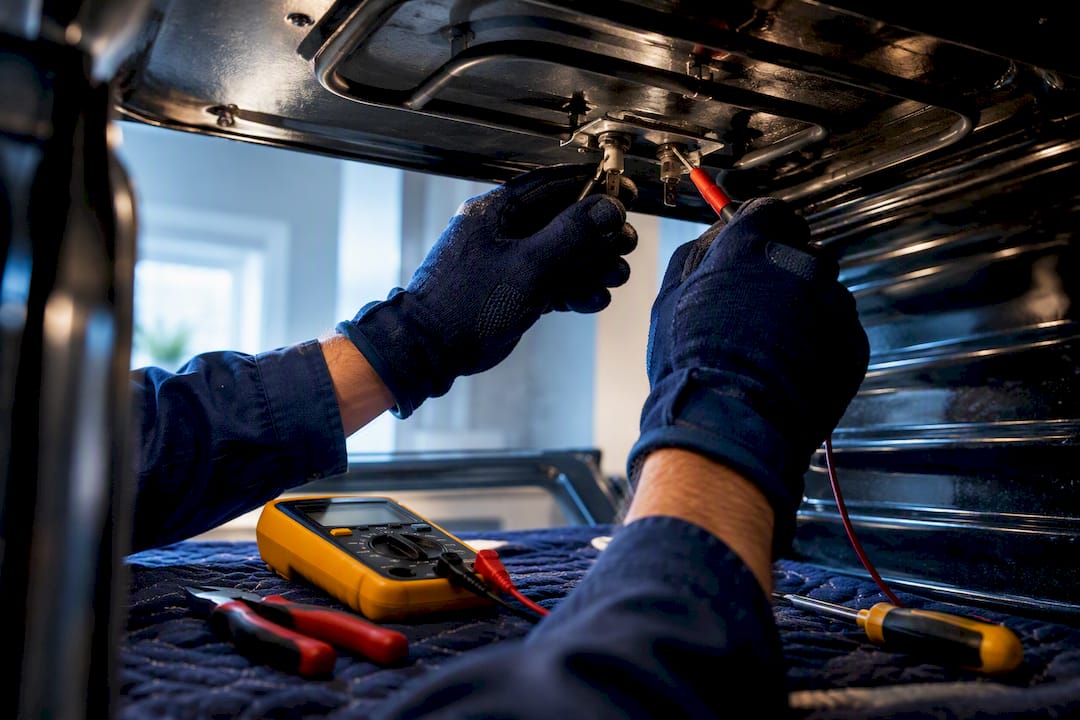
If your broiler not working has you staring at a cold oven, the culprit is usually one of five things: a wrong setting or rack position, a tripped breaker, a burned-out electric element, a weak gas igniter, or a control-board fault. Start by cutting power at the breaker before touching anything electrical, and if you smell gas, stop immediately and get outside. Most of these problems are diagnosable in under 20 minutes with a flashlight and a multimeter.
TL;DR:
- A tripped double-pole breaker, incorrect rack position, or improperly set mode can cause a broiler to appear not to work, even if the appliance is functioning.
- An electric broil element showing visible damage or reading “open” on a multimeter needs replacement, while wiring damage suggests a professional repair.
- A gas igniter that glows but does not ignite the burner indicates a failing igniter or clogged burner ports, requiring cleaning or part replacement.
- Control board, relay, or sensor failures are harder to diagnose and should be tested by professionals, especially if power and basic component checks are normal.
- DIY troubleshooting should be limited to quick setup, visual inspections, and continuity tests; problems involving wiring, gas, or control boards require calling a licensed technician.
Table of Contents
- Why Is My Broiler Not Working? Quick Checks First
- Electric Broiler Checks: Element and Wiring
- Gas Broiler Checks: Igniter and Burner Ports
- Hidden Culprits: Control Boards, Relays, and Sensors
- DIY Testing Checklist Before You Call for Help
- When to Stop and Call a Professional
- What a Technician Actually Sees in the Field
- Get Your Broiler Fixed Without the Guesswork
- Sources
- FAQ
Why Is My Broiler Not Working? Quick Checks First
Before you assume the worst, rule out the simple stuff. A surprising number of “broken” broilers are simply set up incorrectly or losing partial power.
Run through this sequence:
- Confirm you’re actually in broil mode, not “Broil Low” when you meant “Broil High” (or vice versa). Many ranges default to a low setting that produces barely visible heat.
- Check the door position your manual specifies. Some ovens want the door cracked open during broil; others require it fully closed with a self-locking latch.
- Move the rack to the top or second-from-top position. A rack set too low won’t get near the element, so it feels like nothing’s happening.
- Turn the broiler on and wait a full 60 to 90 seconds before judging anything. Electric elements need a moment to glow orange, and gas igniters cycle through a warmup sequence.
- Head to your electrical panel and look for a tripped double-pole breaker. If it’s only partially tripped, the oven might bake fine but lose power specifically to the broil circuit.
Pro Tip: If your broiler glows for a minute, shuts off, then glows again a few minutes later, that’s normal cycling, not a failure. Ovens regulate broil temperature by turning the element on and off, and manufacturer guidance on broiler cycling behavior confirms this is by design, not a defect.
Electric Broiler Checks: Element and Wiring
If the quick checks didn’t fix it and you have an electric range, the broil element itself is the next suspect. Before you touch anything, cut power at the breaker. This isn’t optional. The broil circuit typically runs on 240 volts, and there’s no diagnostic worth a trip to the emergency room.
Start with a visual inspection. Pull the element forward (most sit on hinges or slide-out brackets) and look for:
- Blisters or bubbling along the metal sheath
- Visible cracks or a section that’s split open
- Dark burn spots or pitting where the coil looks thinner than the rest
- A section that sags or has visibly separated
Photograph anything suspicious. It speeds up parts ordering if you end up calling a technician.
Next, test continuity with a multimeter. With power confirmed off, remove the mounting screws, disconnect the terminals, and touch a probe to each terminal end. A healthy broil element usually reads somewhere between 15 and 40 ohms. If your meter shows “OL” (open line), the element has an internal break and needs replacing. There’s no repairing a burned element. It’s a straight swap.
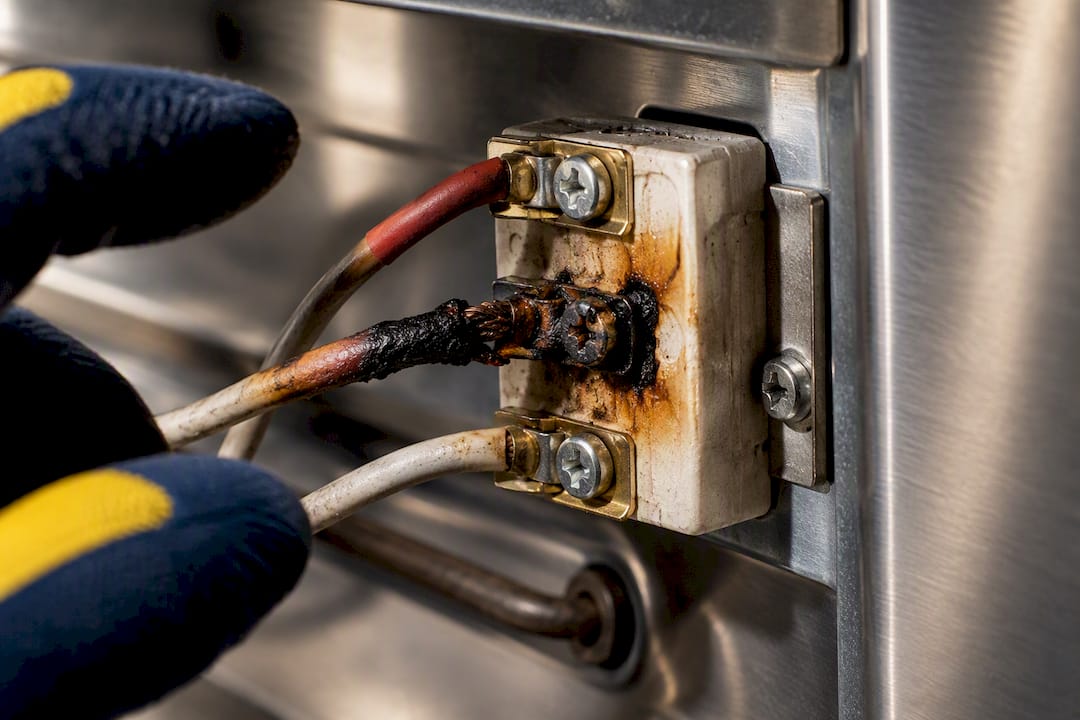
While you’re in there, check the terminal block for melted insulation or scorched wire near the connectors. Heat damage tends to show up right at the connection point, not mid-cable. If you find melted plastic or blackened wire, that’s a wiring repair, not a simple element swap, and it’s worth having a pro look at it before you reconnect anything.
Gas Broiler Checks: Igniter and Burner Ports
Gas broilers fail differently than electric ones, and the diagnosis centers almost entirely on the igniter.
- Turn the broiler on and watch the igniter (the small ceramic rod near the burner). It should start glowing within 30 to 60 seconds and glow progressively brighter.
- Watch what happens next. A healthy igniter gets hot enough to draw enough current, roughly 3.2 to 3.6 amps, to trip open the gas safety valve, and you’ll hear or see the burner catch. A weak igniter glows but never gets hot enough to pull that current, so the valve stays shut and no flame appears.
- If the igniter glows dimly, flickers, or takes far longer than a minute, treat that as a strong sign it’s failing.
- Check the burner ports for soot buildup or debris. Clogged ports can cause uneven ignition or delayed catch, even with a decent igniter. Clean them with a soft brush or a vacuum attachment. Never use water or liquid cleaner on burner ports, since trapped moisture can cause corrosion or ignition problems later.
Pro Tip: Never try to light a gas broiler manually with a match or lighter. If you smell gas at any point, stop immediately, don’t flip any switches, ventilate the area, and call your gas utility or a qualified technician.
Igniter replacement is the fix in most weak-igniter cases, and it’s a comparatively inexpensive part relative to control-board or gas-valve work.
Hidden Culprits: Control Boards, Relays, and Sensors
Sometimes the element is fine, the igniter glows perfectly, and the broiler still won’t fire. That points to something upstream: the control board, a relay, or a temperature sensor.
- A failed broil relay often shows “BROIL” on the display, and the fan or light might even turn on, but no voltage ever reaches the element. Bake works fine because it runs through a separate relay.
- A bent or shifted oven temperature sensor, or one that’s drifted out of its normal resistance range, can cause the control board to cut broil power as a protective measure even though nothing is visibly wrong.
- Burnt or discolored traces on the control board, a burning-plastic smell near the board, or a board that resets randomly are signs of electrical failure that go beyond a simple part swap.
- If a technician measures for 240 volts at the element terminals with the control set to broil and finds nothing, that’s strong evidence the relay itself has failed rather than the element.
These faults sit past the point most homeowners should go without training in live voltage testing. If you’ve confirmed the element and igniter are both healthy and it still won’t fire, this is where a service call earns its cost.
DIY Testing Checklist Before You Call for Help
Grab a multimeter, a nut driver, a flashlight, needle-nose pliers, and your phone camera. Then work through this order:
- Kill power at the breaker. If you smell gas anywhere, skip everything else, ventilate, and call your gas utility.
- Run the quick settings and rack checks from earlier, since roughly a third of “broken broiler” calls turn out to be simple setup issues.
- Visually inspect the element or igniter for the damage signs described above, and photograph anything unusual.
- Test continuity on the element with power confirmed off. Record the ohm reading or note if it shows OL.
- If you’re comfortable and qualified, check for voltage at the element terminals with the control set to broil. If you’re not confident doing this safely, stop here.
Write down your oven’s model and serial number, the exact symptoms, and every test result. That single page of notes often shaves real time off a service visit, since a technician arrives already knowing what’s been ruled out.
When to Stop and Call a Professional
Some situations aren’t worth the risk of a DIY fix, no matter how handy you are.
- You smell gas anywhere near the appliance, at any point in the process.
- You see burnt, melted, or exposed wiring near the element or terminal block.
- You can’t confirm the breaker is fully off, or the range is hardwired without an easy disconnect.
- The problem points to the control board, a relay, or gas-valve components rather than a simple part swap.
Gas-valve work, control-board replacement, and any wiring fault inside the cabinet are jobs left to a licensed technician. So is relay testing under actual load, since that requires live voltage measurement most homeowners shouldn’t attempt. If you’ve documented your model number, symptoms, and test results, that paperwork alone often speeds up the visit and can reduce the diagnostic time a tech spends confirming what you already ruled out. Oven repair visits that come with a one-year warranty on parts and labor also mean you’re not paying twice if the same fault resurfaces.
What a Technician Actually Sees in the Field
Most broiler calls come down to two parts: a burned element or a weak igniter, and both are usually cheaper fixes than homeowners expect. A continuity test with a basic multimeter confirms a bad element in minutes, which is something most people can safely do themselves. Control boards and gas-valve issues are a different story. Bring documentation to that visit; it saves everyone time.
— Rich
Get Your Broiler Fixed Without the Guesswork
Diagnosing an element or igniter yourself is one thing. Getting a control board or gas-valve issue fixed correctly the first time is another, and that’s where booking a visit makes more sense than pulling apart a range you’re not fully sure about. Professional appliance repair services handle in-home diagnosis, parts, and repair for oven broilers, often backed by a one-year warranty on parts and labor for coverage if issues resurface.
Before you book, have your model number handy along with a quick note on what tests you already ran (continuity reading, whether the igniter glowed, breaker status). It speeds up the visit and often means a lower diagnostic time on-site. Check out oven repair for details, or head straight to scheduling service online to get a technician out. If anything about the issue involves a gas smell or exposed wiring, call rather than wait for an online slot.
Sources
For deeper troubleshooting detail, these guides cover the diagnostic steps referenced throughout this article: Oven broiler not working: Causes & fixes to try, Common broiler causes and fixes, Electric oven not heating when broiling, and self-clean cycles and thermal fuse issues.
- Oven broiler not working: Common causes & how to fix | Axis Repair
FAQ
Why Is My Broiler Working but Not My Oven?
This usually points to a bad bake element or a bake-specific relay failure on the control board, since bake and broil run on separate circuits. If broil works fine but bake doesn’t, test the bake element for continuity the same way you’d test a broil element.
How Do I Know if My Oven Element Is Blown?
Look for visible blisters, cracks, or dark burn spots on the element, then confirm with a multimeter continuity test after cutting power. A healthy element typically reads 15 to 40 ohms; a reading of “OL” means the element is open and needs replacement.
My Gas Oven Isn’t Firing Up. What Could Be the Problem?
The most common cause is a weak igniter that glows but doesn’t draw enough current to open the gas valve, so no flame ever catches. Clogged burner ports and a tripped thermal fuse are the next most likely causes, and neither should be diagnosed if you smell gas.
How Do I Replace the Broiler Element in My Oven?
After confirming the breaker is off, remove the mounting screws holding the element in place, disconnect the terminal wires, and swap in a matching replacement part rated for your model. If you’re not fully comfortable working near the 240-volt terminal block, a scheduled oven repair visit avoids the risk of a wiring mistake.
Does a Self-Clean Cycle Cause Broiler Problems?
Yes, the intense heat from a self-clean cycle frequently blows the thermal fuse, which cuts power to the broil circuit as a safety measure. Testing the fuse for continuity is a standard first step before assuming the control board itself has failed.