
Most refrigerator door seals are a straightforward DIY swap: unclip or unscrew the old gasket, seat the new one, and you’re done in 30 to 90 minutes for $30 to $100 in parts. Start by running the dollar-bill test and finding your model number on the data plate. If the door still won’t seal after that, or the frame is bent, it’s time to call a technician.
TL;DR:
- The dollar-bill test should be performed at multiple points around the door to accurately assess seal integrity, checking for resistance at each corner.
- Visible damage, gaps, mold, frost buildup, or a flattened gasket indicate a likely need for a replacement gasket.
- OEM gaskets, matched by model number, provide the best fit and seal, while universal kits may require trimming and are less reliable on newer units under warranty.
- Proper installation involves warming the gasket with a hairdryer, carefully aligning and snugging screws, then retesting before fully tightening to ensure a proper seal.
- Call a technician if the door is damaged, hinges are faulty, or repeated gasket failures occur despite correct installation, to avoid further damage or ineffective repairs.
Table of Contents
- How to Tell if Your Door Gasket Is Bad
- How to Find the Right Replacement Gasket
- Step-by-Step Refrigerator Door Seal Replacement
- Getting the New Seal to Sit Right
- When to Call a Professional
- What to Do With the Old Gasket
- Common Mistakes That Ruin a Gasket Swap
- A Technician’s Take on DIY Gasket Repairs
- When You’d Rather Skip the DIY Route
- Sources
How to Tell if Your Door Gasket Is Bad
The dollar-bill test settles most arguments about whether a gasket needs replacing. Close the door on a dollar bill so half hangs outside, then pull. You should feel steady resistance. If the bill slides out with almost no drag, the seal isn’t gripping, and cold air is leaking out around that spot. Repeat the test at the top, bottom, and both side corners, since gaskets often fail unevenly.
Beyond the bill test, look for these warning signs:
- Visible cracks, splits, or brittle spots in the rubber
- Gaps you can see light through when the door is shut
- Mold or black specks along the fold, a sign moisture has been getting trapped
- Frost buildup near the seal or condensation on nearby cabinets
- A gasket that looks flattened or no longer springs back after you press it
Roughly 30 minutes and $50 to $75 in parts covers a typical gasket swap, which makes it one of the cheaper repairs a homeowner can tackle solo.
Before you order a new gasket, try the easy fixes. Wash the existing seal with warm water and mild dish soap. Old spills and grease buildup are enough to break the vacuum in spots. If a section looks warped rather than torn, a hair dryer on low heat for a minute or two can soften it enough to reshape by hand. A thin bead of food-safe silicone can patch a pinhole gap temporarily, but treat that as a stopgap, not a fix. If the rubber is torn, brittle, or shrunk, none of these tricks will hold.
How to Find the Right Replacement Gasket
Start with the model number, not the gasket itself. It’s usually printed on a data plate inside the fridge, on the wall of the fresh-food compartment or just inside the door, sometimes tucked behind the crisper drawer. Your owner’s manual lists it too. That number, not a guess based on measuring tape, is what determines whether a part actually seats correctly.
OEM gaskets, sourced through the manufacturer or a retailer like Lowe’s, match the original mounting holes, fold pattern, and magnet strength exactly. Universal kits, like the SUPCO gasket sold at Home Depot, cost less and work fine on many models, but you’re trimming or stretching a generic shape to fit a door it wasn’t molded for. That’s an acceptable tradeoff on an older fridge you’re not attached to. It’s a riskier bet on a newer unit still under warranty, where an imperfect seal can trigger repeat callbacks.
Here’s how the common buying channels stack up:
| Source | Best for | Tradeoff |
|---|---|---|
| Manufacturer parts store | Exact OEM match by model number | Highest price, longer shipping |
| Appliance-parts sites | Wide selection, part-number search tools | Quality varies by seller |
| Big-box retailers (Home Depot, Lowe’s) | Fast pickup, universal kits | Fit isn’t guaranteed on every model |
| Local appliance-parts dealer | In-person fit advice | Limited stock on rare models |
If you truly can’t find a part number, measure the door’s inside frame at the widest points, height and width, and note whether the gasket is the push-in dart style or held by screws. Round up slightly. Measuring too tight is the single most common reason a replacement gasket won’t seat.
Step-by-Step Refrigerator Door Seal Replacement
Gather your tools first: a Phillips screwdriver, a nut driver or hex driver for retainer screws, a hair dryer, warm water with mild soap, a soft cloth, and a small amount of petroleum jelly. Unplug the refrigerator before you start, move perishables to a cooler if the job will run long, and work on one door at a time so the rest of the unit stays cold.
For push-in (dart) gaskets:
- Starting at a top corner, pull the old gasket’s lip out of its retaining channel and peel it off in one continuous motion.
- Clean the empty channel thoroughly. Old rubber flakes and grime prevent the new gasket from seating flush.
- Warm the new gasket with a hair dryer on low for a few minutes to relax the folds it picked up in shipping.
- Press the top edge’s darts into the channel first, then work down both sides toward the corners.
- Finish the bottom last, easing the corners into place by hand rather than forcing them flat.
That process runs about 30 to 45 minutes once the gasket has had time to warm up.
For screw-retained gaskets:
- Loosen, don’t remove, the retainer screws around the perimeter, working in short sections.
- Slide the old gasket’s lip out from under the loosened retainer strip.
- Tuck the new gasket’s lip under the retainer, starting at the top and working around.
- Snug the screws, close the door, and check alignment before fully tightening anything.
- Run the dollar-bill test around the full perimeter, then go back and tighten each screw fully.
Screw-retained jobs typically take 45 to 90 minutes, mostly because of that alignment check. iFixit’s Whirlpool-specific guide walks through this stretch-and-test method in detail, including the final seal check most DIYers skip.
Pro Tip: A thin coat of petroleum jelly on the gasket’s fold lines makes it slide into the retainer channel without stretching or tearing, and it doesn’t affect the seal once seated.
Getting the New Seal to Sit Right
New gaskets almost always arrive folded from shipping, and that memory works against you during install. A hair dryer on low, held a few inches away and moved constantly, relaxes the rubber in a couple of minutes. Some installers leave the gasket laid flat in a warm room for a day before starting, which works just as well if you’re not in a hurry.
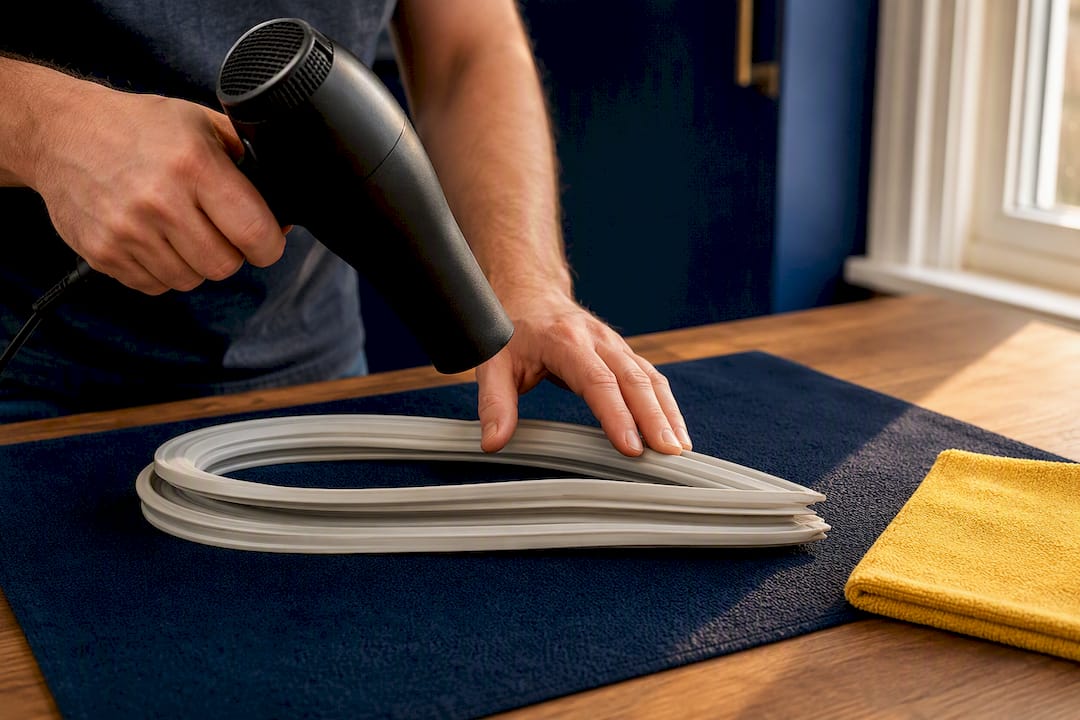
On screw-retained models, resist the urge to crank every screw down as you go. Snug them just enough to hold the gasket in place, close the door, and run the dollar-bill test at each corner before final tightening. This two-pass approach catches misalignment while it’s still easy to fix, instead of after everything’s locked down.
Watch for these post-install issues:
- A corner that won’t lie flat even after warming usually means it’s seated in the wrong channel groove
- A door that clicks or doesn’t latch smoothly may need a hinge adjustment, not a gasket adjustment
- Uneven compression on one side often traces back to a slightly sagging hinge rather than the new seal
Pro Tip: If the bill test fails only at one corner after installation, loosen just the two nearest screws and nudge the gasket slightly before retightening. Don’t start over on the whole door.
If the fridge still runs constantly after a clean install, check the thermostat setting and pull the fridge out to vacuum the condenser coils. Both cause continuous cycling that has nothing to do with the seal.
When to Call a Professional
Some situations move past what’s reasonable to tackle in an afternoon. Call a technician when:
- The door itself is dented, off its hinges, or won’t close square regardless of the gasket
- Retainer screws are rusted or stripped and won’t budge
- You’ve replaced the gasket and it still fails the bill test in the same spot
- The fridge runs constantly even with a good seal, pointing to a cooling system issue
- The door is heavy enough (French-door or commercial models) that hinge work carries real risk to you or the appliance
A technician visit covers correct part sourcing by model number, safe door removal, hinge adjustment, and a diagnostic check on the cooling system if the leak turns out not to be the real problem. On a complicated case, that visit often costs less than two rounds of the wrong replacement part.
What to Do With the Old Gasket
Refrigerator gaskets are made from PVC or synthetic rubber, sometimes with a magnetic strip embedded along the fold. Most curbside recycling programs won’t take either material, so tossing the old seal in the regular trash is the realistic option for most households.
If you want to keep it out of the landfill, check whether your town’s transfer station accepts rubber or PVC scrap separately, some do as part of a household hazardous waste or bulky-item program. A handful of appliance-parts retailers and manufacturers run take-back programs for old gaskets when you order a replacement, though this varies by brand and isn’t guaranteed everywhere.
The magnetic strip is the one part worth separating if you’re handy. Cut it free with utility scissors and it works fine as a small fridge magnet holder or shop magnet for stray screws, better than tossing a usable magnet strip whole. Beyond that, there’s no meaningful resale or reuse market for a worn gasket. Its rubber has already lost the elasticity that made it seal in the first place, so donating or repurposing the whole strip isn’t realistic.
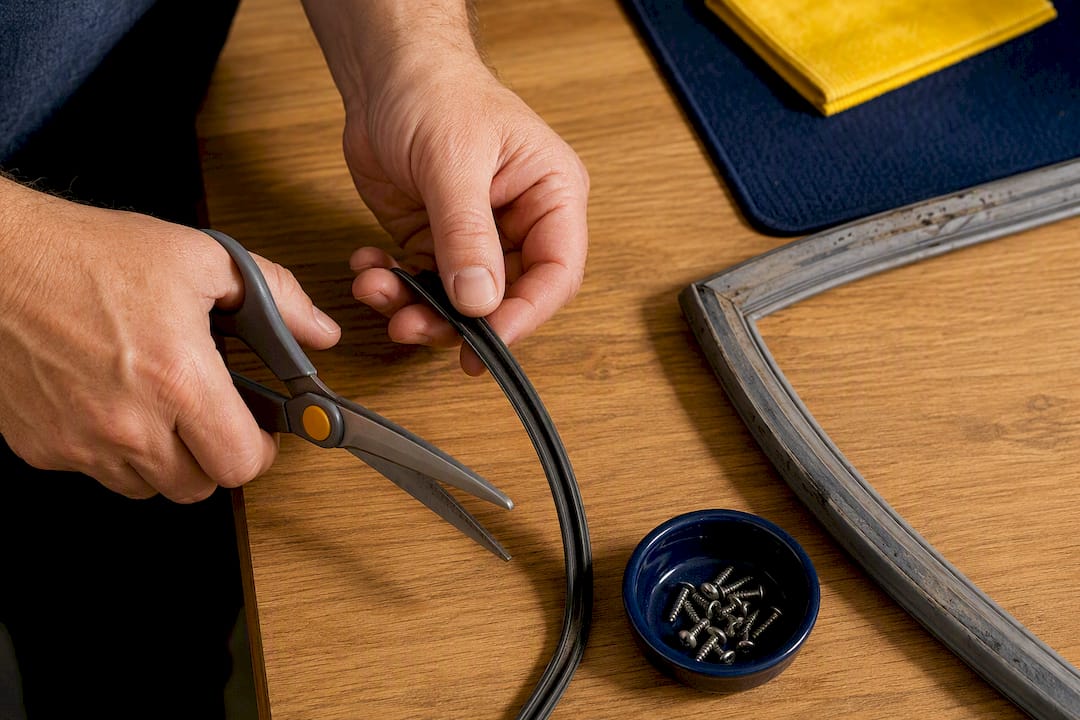
Wipe down the channel area before disposal so you’re not carrying old grime and mold spores through the house. That’s a five-minute step that also makes the new gasket install cleaner.
Common Mistakes That Ruin a Gasket Swap
The biggest one is buying by eye instead of by model number. A gasket that looks close enough often isn’t; a quarter-inch off on width means constant gaps at the corners no amount of warming will fix.
Fully tightening screws before checking alignment is a close second. Once every screw is cranked down, a misaligned corner requires backing out multiple screws to fix, which risks stripping them on a second attempt. Snug first, test, then tighten.
Skipping the warm-up step causes more corner failures than any other single mistake. A gasket installed cold and folded will fight you the whole way and often won’t fully relax into its channel for days, if ever.
Other frequent errors worth flagging:
- Forcing a universal gasket to fit by trimming excess material, which weakens the seal at the cut edge
- Reusing old, brittle retainer clips instead of replacing them along with the gasket
- Working on both refrigerator and freezer doors at once, leaving both compartments open and warming up
- Not cleaning the channel before installing the new gasket, trapping old debris under the new seal
Skip these and a straightforward job stays straightforward.
A Technician’s Take on DIY Gasket Repairs
After nearly 20 years fixing refrigerators across Southern New Hampshire, the pattern is consistent: most gasket failures are simple, and most repeat visits trace back to the same two causes. Someone ordered a part by sight instead of model number, or they fully tightened screws before checking the door’s alignment.
One call that sticks out: a homeowner replaced the gasket twice with the correct part, and it still failed the bill test at one corner. The gasket was fine. A sagging hinge was the actual culprit, and no amount of new rubber was going to fix that.
— Rich
When You’d Rather Skip the DIY Route
Anothercycleappliance is the alternative to spending a Saturday guessing part numbers and returning the wrong gasket twice. If your door still won’t seal after a straightforward swap, or the hinge, cabinet, or cooling system turns out to be the real problem, a technician sourcing the exact part for your model and handling the door removal safely usually costs less than a second wrong order plus your time.

A typical visit for a refrigerator repair starts with an in-home diagnosis, correct OEM part sourcing by your model number, and hinge or alignment work if that’s the actual issue rather than the seal itself. Every job comes with a one-year warranty on parts and labor. Have your fridge’s model number and a description of the problem ready when you call, and check the full service list or service area to book a visit across Southern New Hampshire.
Sources
- How to replace a refrigerator door gasket — Family Handyman
- Whirlpool Refrigerator Door Seal Replacement — iFixit
- How do I tell if a refrigerator door seal is bad? — GE Appliances Repair