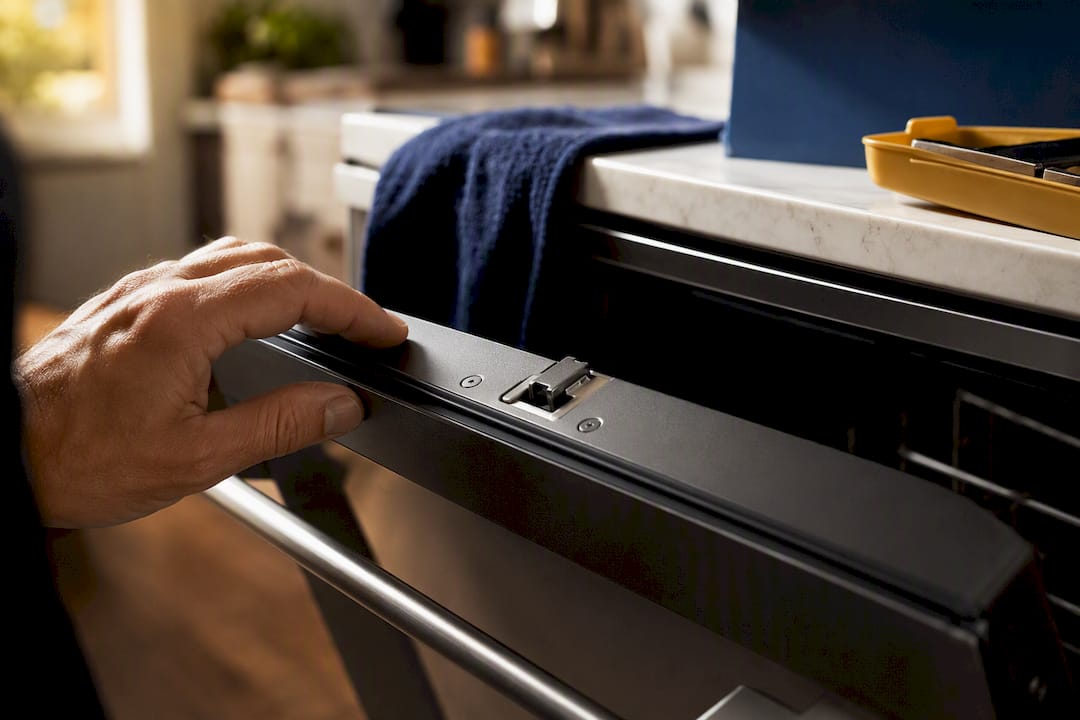
A dishwasher door won’t latch most often because of a stuck rack, a door that isn’t sitting level, or a worn latch mechanism. Start by clearing obstructions and pushing the racks all the way in, then try the press-and-hold test while starting a cycle. If the machine runs only while you hold the door shut, the latch or its switch has failed and needs a closer look or a replacement part.
TL;DR:
- Most dishwasher door latch failures are caused by obstructions, misaligned racks, or worn latch components, not by the latch itself.
- Running a press-and-hold test can identify if the latch or switch is faulty, especially if the cycle only starts when the door is held shut.
- Replacing a door latch typically costs $15 to $40 and takes approximately 20 to 45 minutes to install by a DIYer with basic skills.
- Troubleshooting should follow a sequence from clearing obstructions and leveling to inspecting the strike plate and replacing worn latch parts.
- Call a professional if wiring issues, structural damage, or persistent failures beyond a simple latch fix are present, with costs typically ranging from $95 to $190.
Table of Contents
- Quick Checks to Try Before You Touch a Tool
- What Usually Causes a Dishwasher Door to Not Latch
- Is It the Latch, the Switch, or Alignment?
- DIY Repairs: Cleaning, Adjusting, and Replacing Parts
- When to Call a Pro and What It Costs
- How to Temporarily Secure the Door If the Latch Fails Mid-Cycle
- Field Perspective: What Actually Fixes Most Latch Complaints
- How Anothercycleappliance Gets Your Dishwasher Latching Again
- Manufacturer and Repair Resources Worth Bookmarking
- Sources
Quick Checks to Try Before You Touch a Tool
Before you assume the latch itself is broken, rule out the easy stuff. Most service calls for a dishwasher door that won’t close trace back to something you can fix in under five minutes.
Cut the power at the breaker first if you plan to remove any panel or reach near the door switch. That single habit prevents the vast majority of DIY shock injuries during appliance repairs.
Work through this order:
- Check for obstructions: tall glasses, pan handles, or a utensil that slipped and is blocking the door’s swing path.
- Push both racks fully into the tub. A rack sitting even an inch off track can keep the door from closing flush.
- Close the door and listen for a firm click at the top center. No click usually means the latch isn’t engaging the strike plate.
- Run the press-and-hold test: start a cycle, then press and hold the door closed at the top center. If the dishwasher starts running while you hold it, the latch or switch is the problem, not the door itself.
If you just installed a new dishwasher, don’t panic yet. Manufacturer guidance from GE notes that a brand-new door gasket can be stiff enough to resist closing on the first few uses. Pushing firmly on the top center of the control panel while latching often seats the gasket and solves the issue within a week or two.
Pro Tip: Mark the exact spot where the door needs pressure to latch with a strip of painter’s tape. It helps you (or anyone else in the house) close the door correctly until the gasket breaks in or the repair is done.
What Usually Causes a Dishwasher Door to Not Latch
Once you’ve ruled out an obstruction, the cause is almost always mechanical or structural. Here’s what shows up most often on service calls:
- Obstruction or displaced rack. Dishes, silverware baskets, or a rack that’s popped off its rollers stop the door from seating fully.
- Worn or broken latch assembly. The plastic hook or the microswitch inside it wears out or cracks after years of daily use.
- Bent or misaligned strike plate. The metal or plastic piece the latch hooks into shifts out of position, so the latch closes but doesn’t catch.
- Worn door springs or hinges. Weak springs let the door sag, throwing off the alignment between latch and strike plate.
- Damaged or hardened door gasket. An old, brittle gasket won’t compress the way it should, adding resistance the latch can’t overcome.
- A dishwasher that isn’t level. If the unit has shifted in its cabinet opening, the whole door frame tilts just enough to miss the strike plate.
A practical troubleshooting sequence followed by repair techs checks obstructions and rack position first, then leveling and strike plate alignment, and only then moves to the latch, springs, and hinges. That order matters because it fixes the most common problems first and saves you from replacing a part that was never actually broken.
Latch replacement is one of the more affordable dishwasher fixes. A replacement latch commonly runs $15 to $40 for the part and takes most people 20 to 45 minutes to install once the door panel is off.
Is It the Latch, the Switch, or Alignment?
The press-and-hold test tells you most of what you need to know. Run through this quick diagnostic:
- Firm click, door stays closed, cycle won’t start: the door switch (microswitch) inside the latch has likely failed even though the mechanical latch still catches.
- No click, door feels loose or mushy when you push it shut: the latch hook itself is worn or broken.
- Cycle only runs while you physically hold the door: that’s a clear signal the latch or its internal switch needs replacement, according to manufacturer troubleshooting guidance.
- Door closes fine on one side but gaps on the other: check the strike plate position and whether the unit is level, not the latch.
You can visually inspect the strike plate, gasket, and rack seating without removing any panels. If those all look fine and you suspect the switch itself, a multimeter can confirm continuity, but only test it with the breaker off and only if you’re comfortable working near wiring.
DIY Repairs: Cleaning, Adjusting, and Replacing Parts
Most latch problems fall into one of three fixes: clean it, adjust it, or swap the part. Here’s how to tackle each one.
Before you start: gather a screwdriver set, a flashlight, and your phone camera. Cut power at the breaker, then put a towel under the door so it doesn’t scratch your floor while you work.
- Clean the latch and strike plate. Grime and dried food buildup are common culprits. Wipe both parts down and apply a small amount of manufacturer-safe silicone lubricant to the latch hook.
- Adjust the strike plate. If it’s slightly bent or off center, loosen its mounting screws and shift it a few millimeters toward the latch, then retighten.
- Level the dishwasher. Adjust the front leveling feet with a wrench until a level reads flat side to side and front to back, then recheck the door alignment.
- Check springs and hinges. Look for stretched or disconnected door springs. Some models allow basic re-tensioning, but this varies enough by brand that it’s worth confirming your model’s approach before adjusting.
- Replace the latch assembly if needed. Remove the inner door panel screws, unplug the wiring harness, swap in the new latch, and reconnect. Field techs commonly photograph the wiring connections before disconnecting anything, which avoids guesswork during reassembly.
- Test it. Close the door, confirm you hear the click, run a short cycle, and check underneath for leaks afterward.
Pro Tip: Take a photo of the wiring harness orientation before you unplug it. It sounds unnecessary until you’re staring at three identical-looking wires twenty minutes later.
If you’re removing the inner door panel for the first time, a guide on avoiding common pitfalls with DIY panel work is worth a look before you start unscrewing anything.
When to Call a Pro and What It Costs
Some problems are worth handing off, especially once wiring or structural damage enters the picture.
Call a professional if you find:
- Electrical faults beyond the door switch, like a control board that won’t communicate with the latch.
- Broken hinges or springs that require disassembling the door frame.
- A warped tub or door panel that no longer sits square.
- Wiring damage you can’t fully trace or a persistent leak that shows up regardless of the latch fix.
Expect a diagnostic visit plus latch replacement to run in the range of $95 to $190 total in many local markets, including parts and labor. Spring, hinge, or leveling repairs can cost more depending on what’s involved.
When you call, have your model number ready, a couple of photos of the issue, and a quick summary of what you already tried. A reputable repair company will give you a clear estimate before starting work and back the repair with a warranty on parts and labor, not just a handshake.
How to Temporarily Secure the Door If the Latch Fails Mid-Cycle
If the latch gives out while a cycle is already running, don’t just walk away and hope it finishes. A door that pops open mid-wash can spray water and lets hot, soapy water pool where it shouldn’t, and on some models it interrupts the cycle entirely.
The safest short-term fix is a physical brace, not tape on the latch itself. Wedge a sturdy kitchen chair against the door, or use a bungee cord looped from the door handle to a nearby stable anchor like a cabinet pull, to keep the door pressed shut without touching the electrical components.
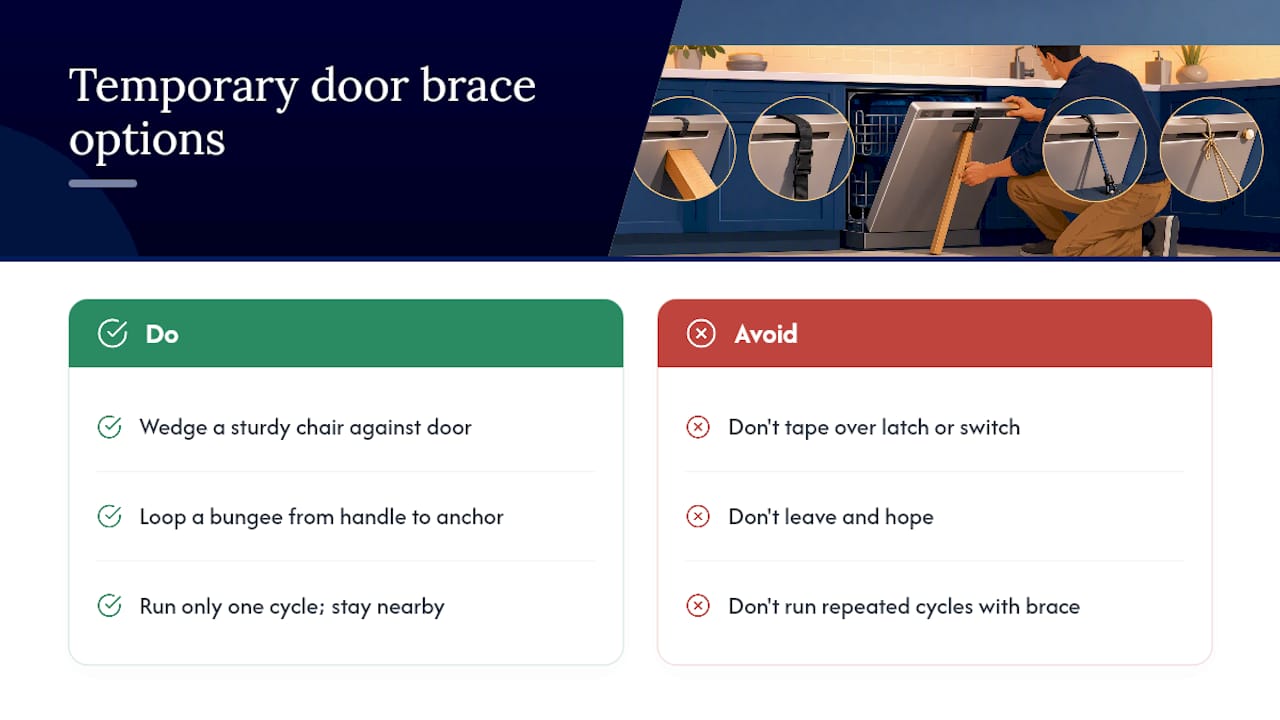
Avoid taping directly over the latch or door switch. Moisture and heat can make adhesive residue worse to clean later, and it doesn’t address the pressure the door actually needs to stay sealed.
If you need to run a load before you can fix the latch properly, brace the door for that one cycle only, and stay near the kitchen in case anything shifts. Treat it as a stopgap, not a fix. Running the dishwasher repeatedly with a propped-shut door puts ongoing strain on the hinges and gasket, and it can turn a $20 latch repair into a bigger job if the door frame takes damage in the meantime.
Field Perspective: What Actually Fixes Most Latch Complaints
Most latch calls we see get solved by the boring stuff first: clearing an obstruction or re-leveling the unit. Field reports on leveling issues back this up. Don’t force the door shut when it resists. That habit cracks latch plastic and bends strike plates, turning a $20 fix into a $150 one. When the part itself is worn, replacing it is usually faster and cheaper than repeated adjustment attempts. Anothercycleappliance backs every repair with a one-year warranty on parts and labor, built on nearly two decades of service calls just like this one.
— Rich
How Anothercycleappliance Gets Your Dishwasher Latching Again
If the checks above didn’t solve it, or you’d rather skip the disassembly altogether, that’s exactly the kind of call Anothercycleappliance handles every week across Southern New Hampshire. You get a technician who diagnoses the actual cause, whether it’s a worn latch, a leveling problem, or a switch that’s failed, quotes the repair cost before touching anything, and backs the finished job with a one-year warranty on parts and labor.

DIY works well for cleaning, leveling, and simple latch swaps. It’s a better idea to call in help when you’re dealing with wiring, a cracked door frame, or a repeat failure that keeps coming back. A dishwasher repair visit includes a full diagnosis, a clear parts estimate, the repair itself, and a test run before the technician leaves. If your dishwasher door still won’t latch after trying the fixes above, request service now and get it handled properly the first time.
Manufacturer and Repair Resources Worth Bookmarking

For model-specific latch replacement steps, check your manufacturer’s support page (GE and Whirlpool both publish latch troubleshooting guides) and always match parts to your exact model number before ordering a replacement.
Sources
- Dishwasher – Door Will Not Latch
- Dishwasher door latch broken how to replace | Appliance Aid
- Dishwasher door latch not closing? Here’s how to fix it